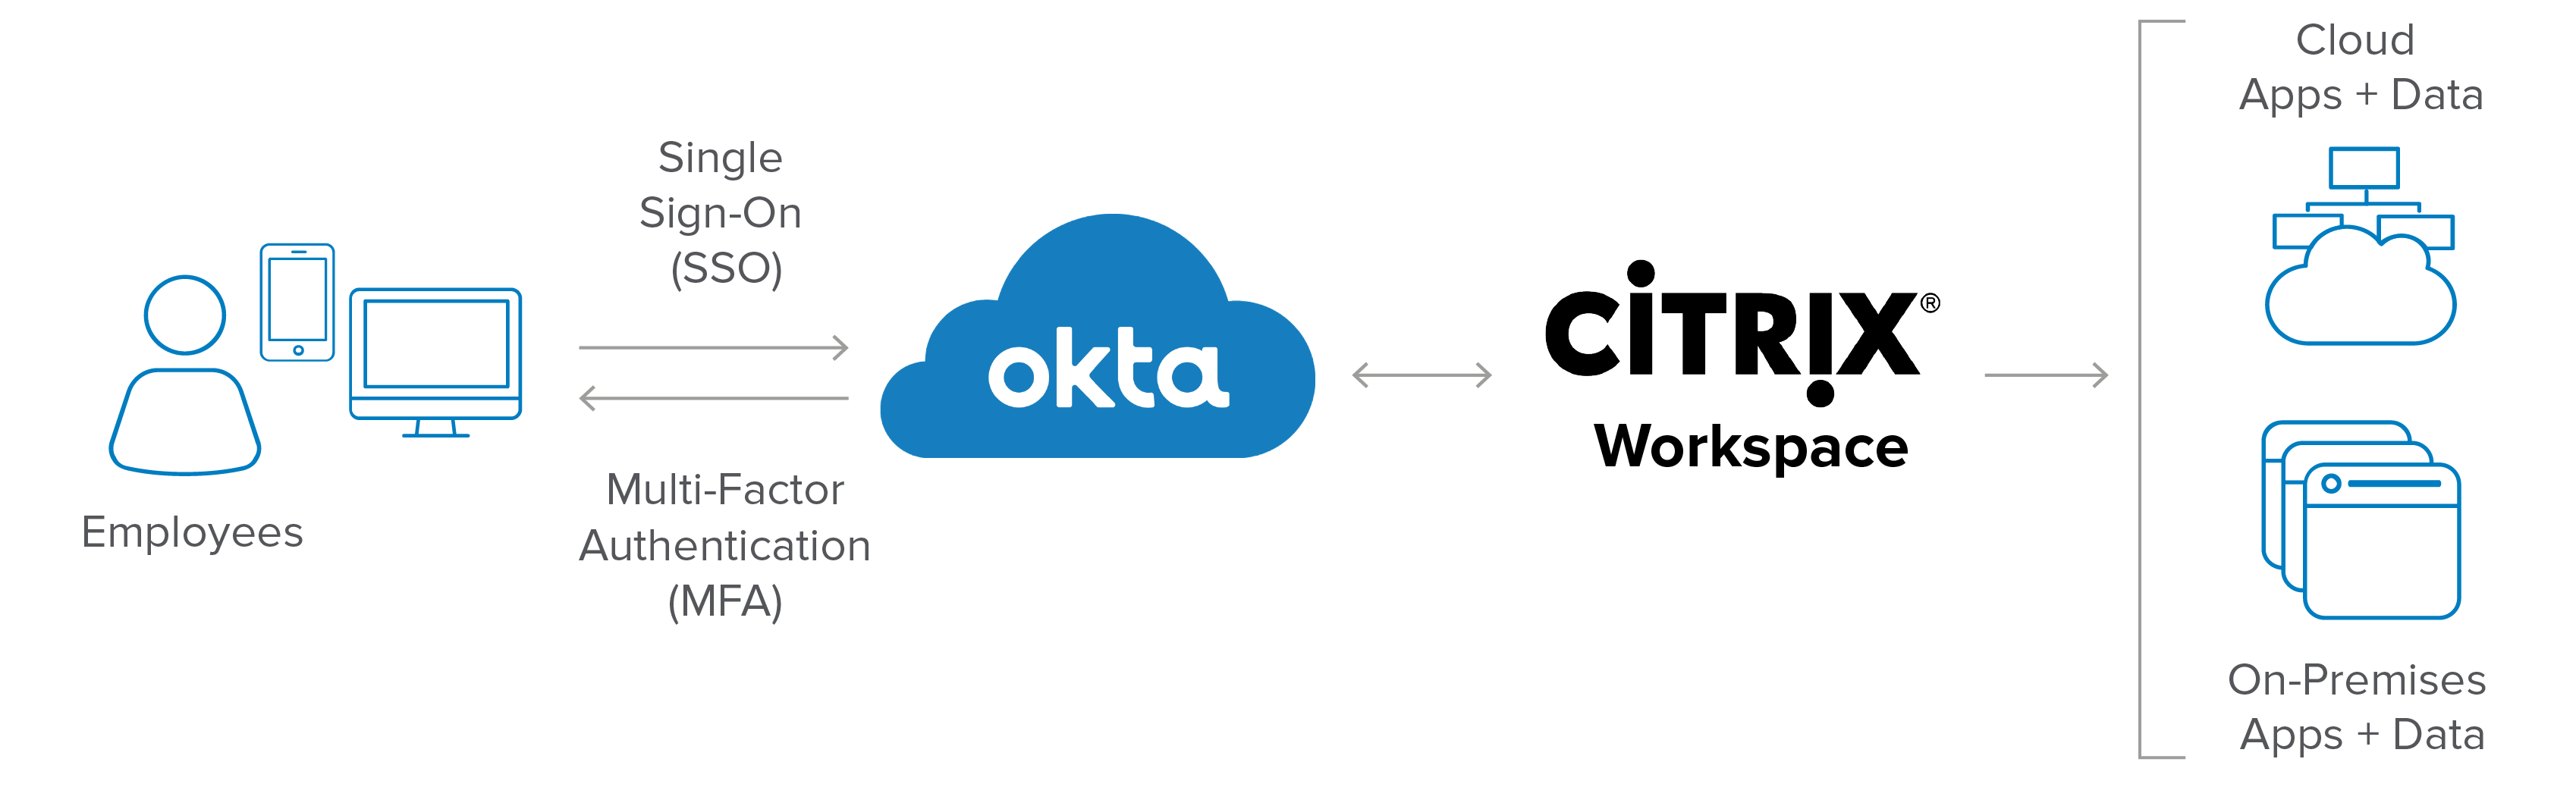
In this 2 parts article, I will provide step-by-step guidance on how to configure Citrix Cloud with Okta authentication and SSO for domain-joined computer connecting within the corporate network.
In this first part, we will configure:
- Cloud Connectors
- Okta
- Citrix Cloud Okta connection
- Citrix Workspace configuration
- Validate
Cloud Connectors
First thing that you will need to configure if you are new with Citrix Cloud will be to configure Cloud Connectors.
Here are the steps:
- Deploy Windows Server(s).
- Join the server(s) to your AD Domain.
- Update the Windows Server(s) OS with all Windows patches.
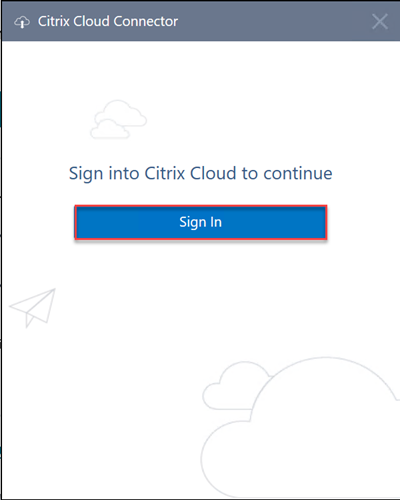
- Connect to https://us.cloud.com and authenticate.
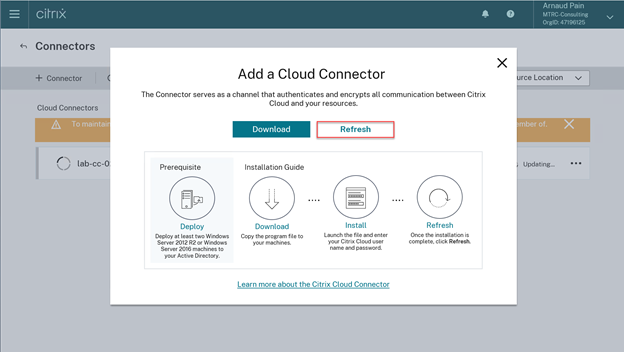
- Click on Menu and select Resource Locations.
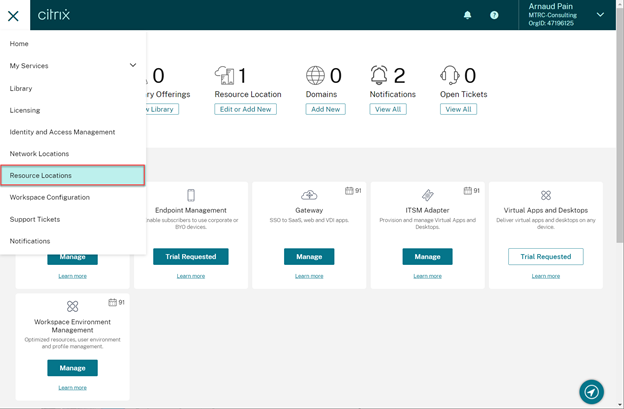
- Click on Cloud Connectors.
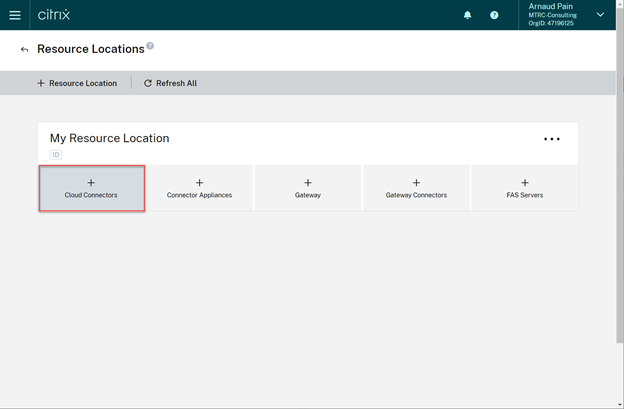
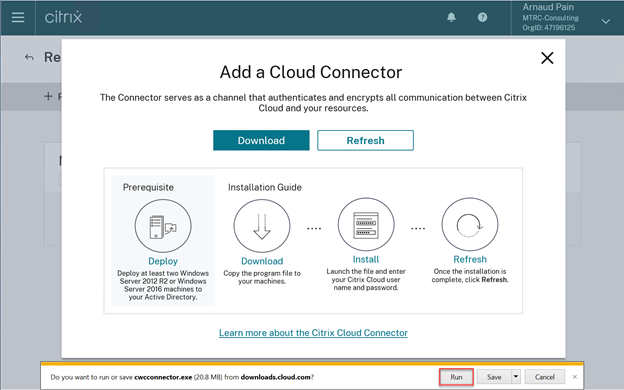
- Click on Download.

- Click on Run.
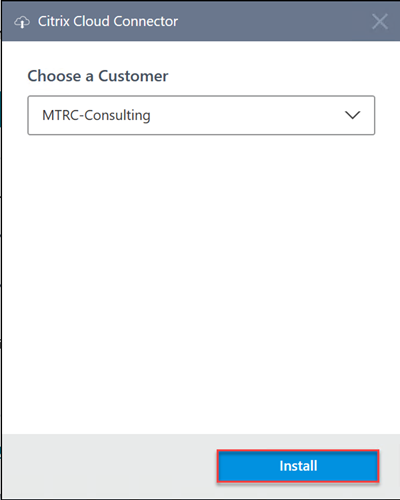
- Click on Install.
- Select Customer if multiple and click on Install.
- Click on Close.
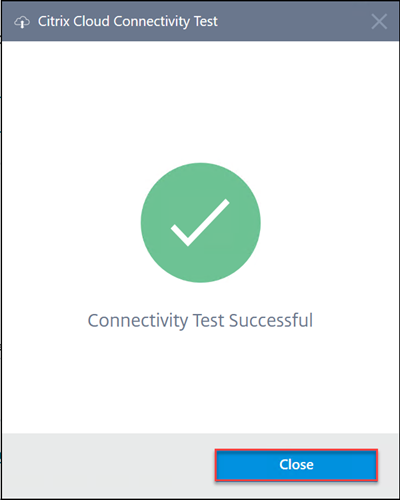
- Click on Refresh.
- Cloud Connector should be listed (an update may be required, if so server will be updated and rebooted).
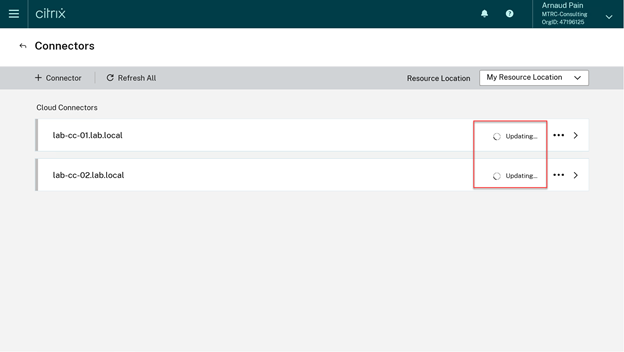
- After successful update and reboot, Cloud Connector should appear as Green.
Citrix Cloud Okta Configuration
Okta OIDC Web Application
To use Okta as an identity provider, you must first create an Okta OIDC web application with client credentials you can use with Citrix Cloud. After you create and configure the application, note the Client ID and Client Secret. You supply these values to Citrix Cloud when you connect your Okta organization.
Create an Okta OIDC web application.
- From the Okta management console, under Applications, select Applications.
- Click Add Application
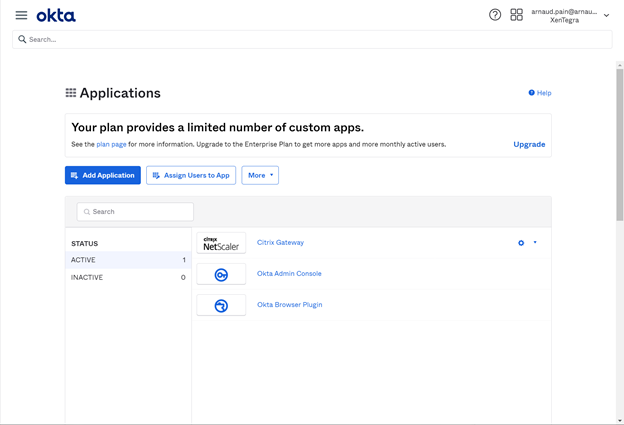
- Click Create New App.

- In Sign in method, select OpenID Connect and then click Create. The Platform default value (Web) is unchanged.

- Enter an application name.
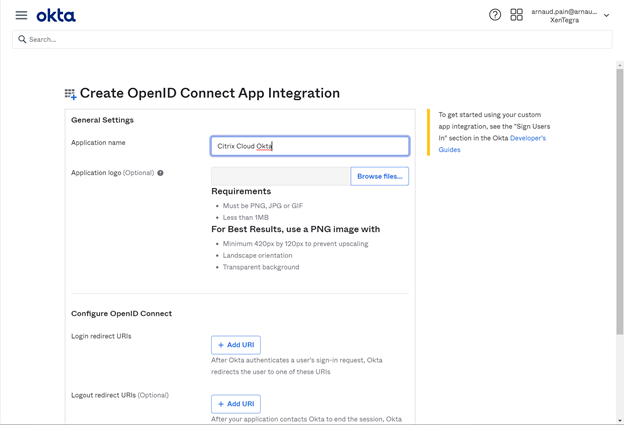
- In Login redirect URIs, enter https://accounts.cloud.com/core/login-okta.

- In Logout redirect URIs, enter your Workspace URL from Citrix Cloud.

- Click Save.
Configure the Okta OIDC web application.
In this step, you configure your Okta OIDC web application with the settings required for Citrix Cloud. Citrix Cloud requires these settings to authenticate your subscribers through Okta when they sign in to their workspaces.
- From the Okta application configuration page, in General Settings, click Edit.
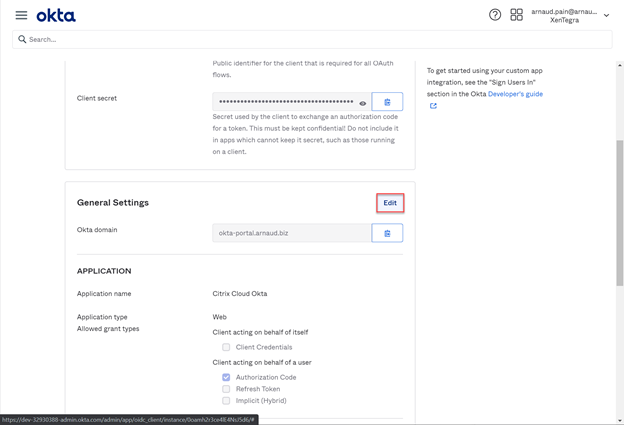
- In Allowed grant types, select the following options:
- Authorization Code
- Refresh Token
- Implicit (Hybrid)
- Allow ID Token with implicit grant type
- Allow Access Token with implicit grant type
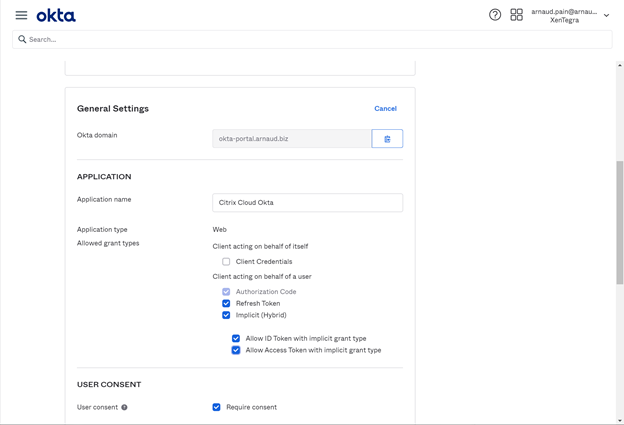
- Click Save.
- Allow user or group access to the application:
- From the Assignments tab, select Assign and then select Assign to People or Assign to Groups.
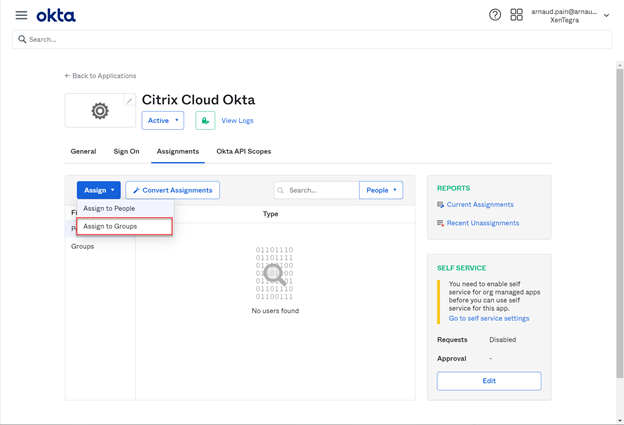
- Select the users or groups you want to have access to workspaces. To allow access for all users, select Assign to Groups and then select Everyone.
- Click Done.
- Add application attributes. These attributes are case-sensitive.
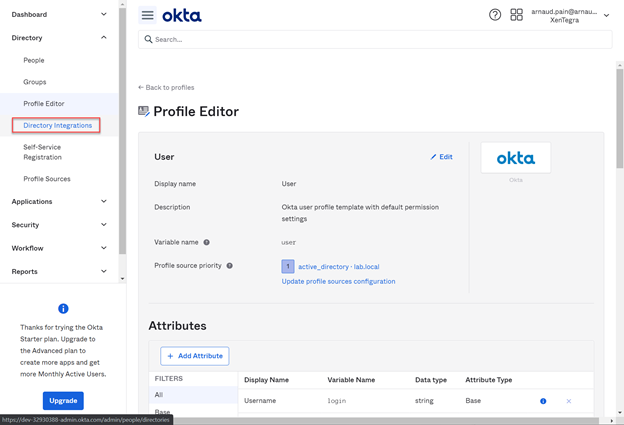
- From the Okta console menu, select Directory > Profile Editor.
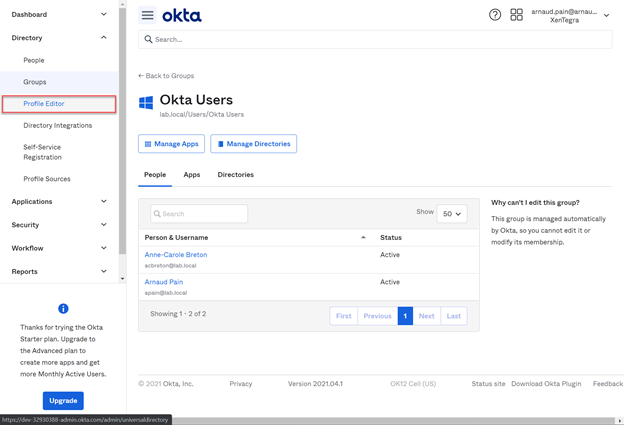
- Locate the Okta user profile and select Profile. Under Attributes, select Add attribute.

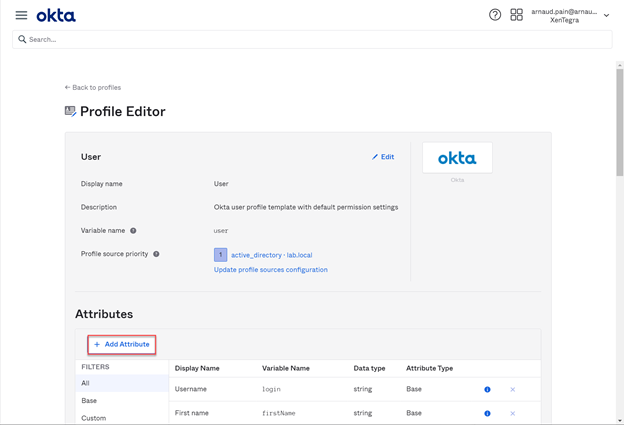
- Enter the following information:
- Display Name: cip_sid
- Variable Name: cip_sid
- Description: AD User Security Identifier
- Attribute Length: Greater than 1
- Attribute Required: Yes

- Click Save and Add Another.
- Enter the following information:
- Display Name: cip_upn
- Variable Name: cip_upn
- Description: AD User Principal Name
- Attribute Length: Greater than 1
- Attribute Required: Yes

- Click Save and Add Another.
- Enter the following information:
- Display Name: cip_oid
- Variable Name: cip_oid
- Description: AD User GUID
- Attribute Length: Greater than 1
- Attribute Required: Yes
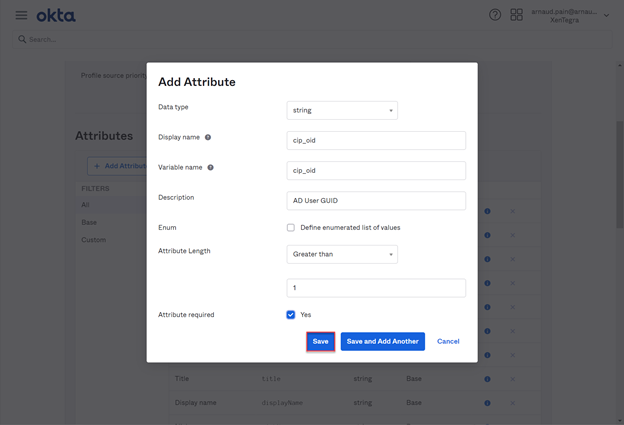
- Click Save.
- Edit attribute mappings for the application:
- From the Okta console, select Directory > Directory Integrations.
- Select the AD you previously integrated. For more information, see Sync accounts with the Okta AD agent


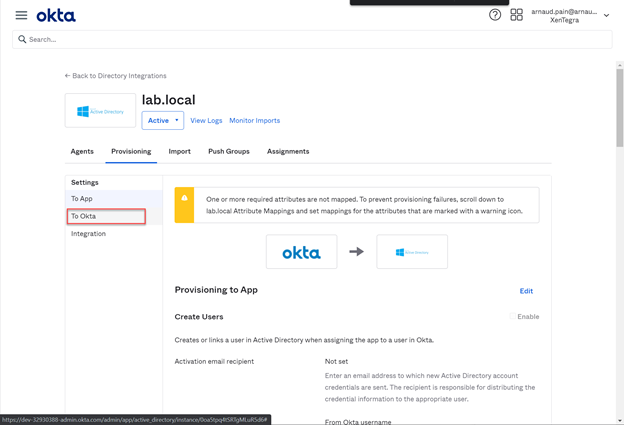
- On the Settings tab, select Edit Mappings.
- Map the following attributes:
- Select
appuser.objectSidand map to thecip_sidattribute. - Select
appuser.userNameand map to thecip_upnattribute. - Select
appuser.externalIdand map to thecip_oidattribute.
- Select
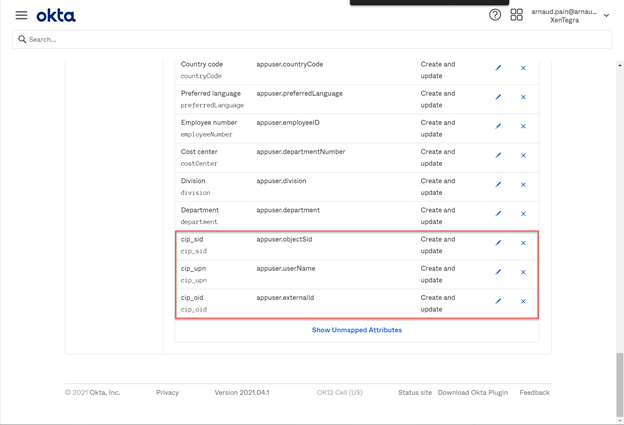
- Click Save Mappings.
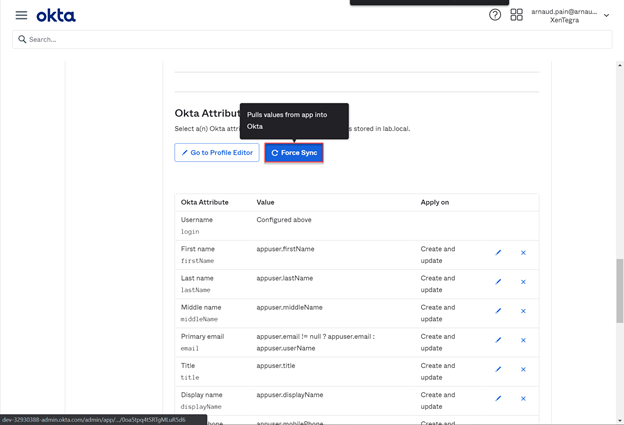
- Click Apply updates now.
Workspace URL
When creating the Okta application, you must supply your Workspace URL from Citrix Cloud. To locate the Workspace URL, select Workspace Configuration from the Citrix Cloud menu. The Workspace URL is shown on the Access tab.
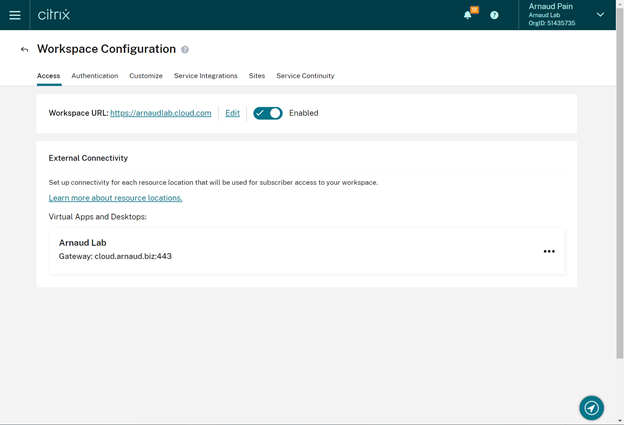
IMPORTANT:
If you modify the workspace URL later on, you must update the Okta application configuration with the new URL. Otherwise, your subscribers might experience issues with logging off from their workspace.
Okta API token
Using Okta as an identity provider with Citrix Cloud requires an API token for your Okta organization. Create this token using a Read-Only Administrator account in your Okta organization. This token must be able to read the users and groups in your Okta organization.
To create the API token, see Create an Okta API token in this article. For more information about API tokens, see Create an API Token on the Okta website.
IMPORTANT:
When you create the API token, make a note of the token value (for example, copy the value temporarily to a plain text document). Okta displays this value only once, so you might create the token just before you perform the steps in Connect Citrix Cloud to your Okta organization.
Create an Okta API token
- Sign in to the Okta console using a Read-Only Administrator account.

- From the Okta console menu, select Security > API.

- Select the Tokens tab.

- Select Create Token.

- Enter a name for the token and click Create Token.
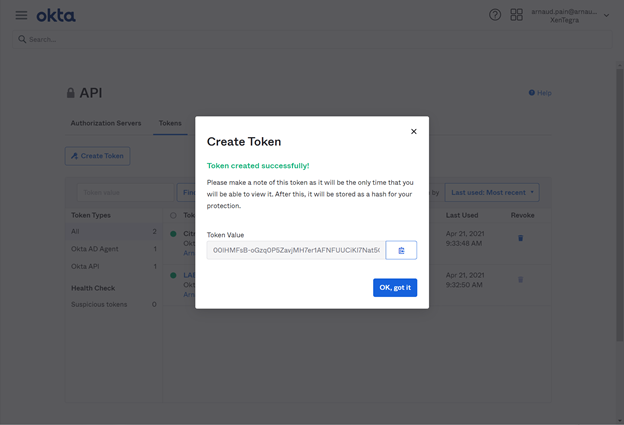
- Copy the token value. You supply this value when you connect your Okta organization to Citrix Cloud.
Sync accounts with the Okta AD agent
To use Okta as an identity provider, you must first integrate your on-premises AD with Okta. To do this, you install the Okta AD agent in your domain and add your AD to your Okta organization. For guidance for deploying the Okta AD agent, see Get started with Active Directory integration on the Okta web site. Afterward, you import your AD users and groups to Okta. When importing, include the SID, UPN, and OID values associated with your AD accounts.
Note:
If you are using Citrix Gateway service with Workspace, you don’t need to synchronize your AD accounts with your Okta organization.
To synchronize your AD users and groups with your Okta organization:
- Install and configure the Okta AD agent. For complete instructions, refer to the following articles on the Okta website:
- Add your AD users and groups to Okta by performing a manual import or an automated import. For more information about Okta import methods and instructions, refer to Manage Active Directory users and groups on the Okta website.
Connect Citrix Cloud to your Okta organization
- Sign in to Citrix Cloud at https://citrix.cloud.com.
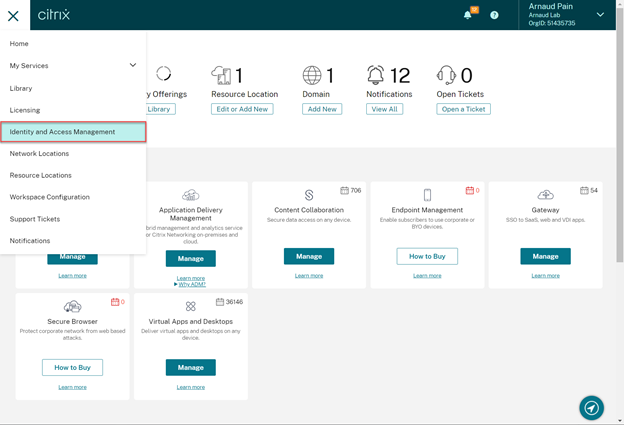
- From the Citrix Cloud menu, select Identity and Access Management.
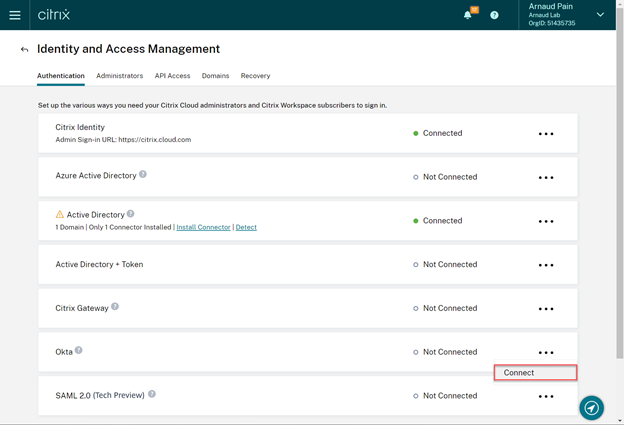
- Locate Okta and select Connect from the ellipsis menu.
- In Okta URL, enter your Okta domain.
- In Okta API Token, enter the API token for your Okta organization.

- In Client ID and Client Secret, enter the credentials for your Okta application. To copy these values from the Okta console, select Applications and locate your Okta application. Under Client Credentials, use the Copy to Clipboard button for each value.

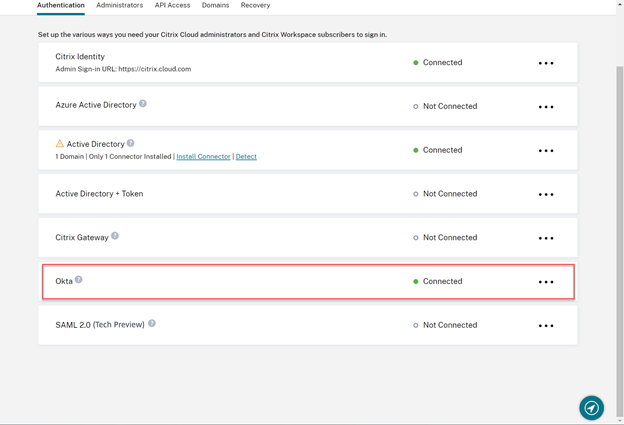
- Click Test and Finish. Citrix Cloud verifies your Okta details and tests the connection.
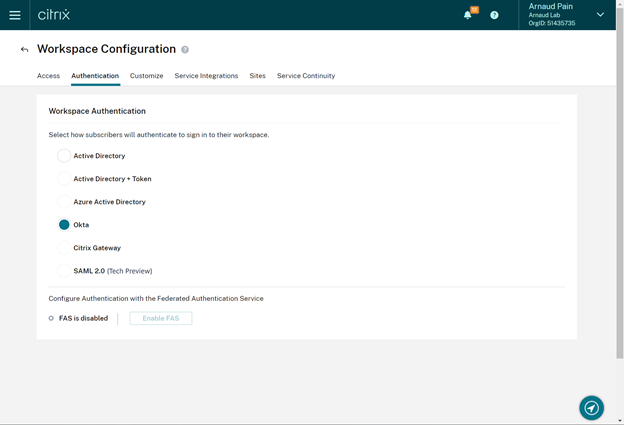
Enable Okta authentication for workspaces

- From the Citrix Cloud menu, select Workspace Configuration > Authentication.

- Select Okta. When prompted, select I understand the impact on the subscriber experience.
- Click Save.
Validation
- Open a Web Browser and point to your Workspace URL.

- You will be redirected to your Okta portal.

- Provide Username and Password and click on Sign In.
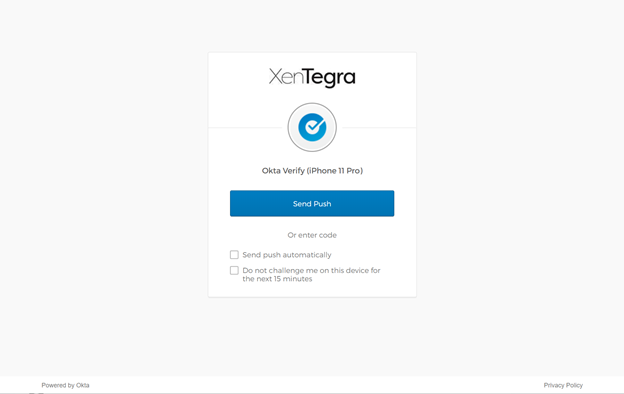
- Click on Send Push and validate on your Device.
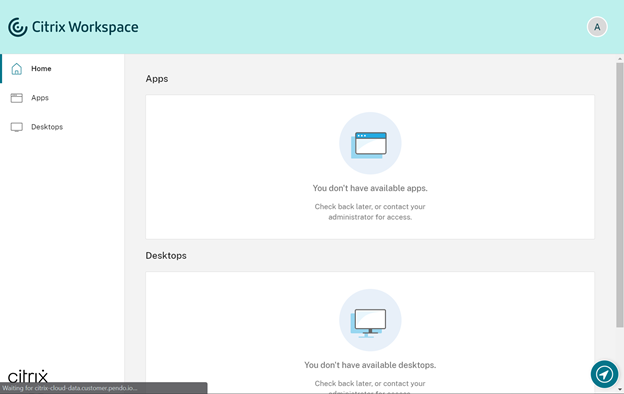
- Validate you have access to Workspace.
In Part-2 I will provide you details on how to Bypass MFA for users and also do SSO for user connecting from Corporate network.
Stay Tuned!!!