
Has not having enough available space on your ADC to update Firmware ever happened to you?
Check here after and find a way to increase the free space on your /var and allow you to update without the need to free space anymore.
This article is based on my own experience and does not mean that Citrix supports it. However, I tested it with customers in production and it worked well.
First thing first, I would recommend you to take a Snapshot of your VPX before doing any change. The fact is that you will not be allowed to upgrade the disk size with Snapshot.
Prerequisites
First, you will need to download FreeBSD ISO. At the time I am writing this article, the latest version is 13.0.
You can download it from this page.

Select the FreeBSD-13.0-RELEASE-amd64-dvd1.iso file. Here is a direct link.
Resize ADC
In this case, you can just clone your ADC to a new VM.
- Shutdown your ADC.
- Ensure you have no Snapshot.

- Edit settings and increase the disk size, in the example below I will upgrade from 20Gb to 40Gb.

- Start your VM.
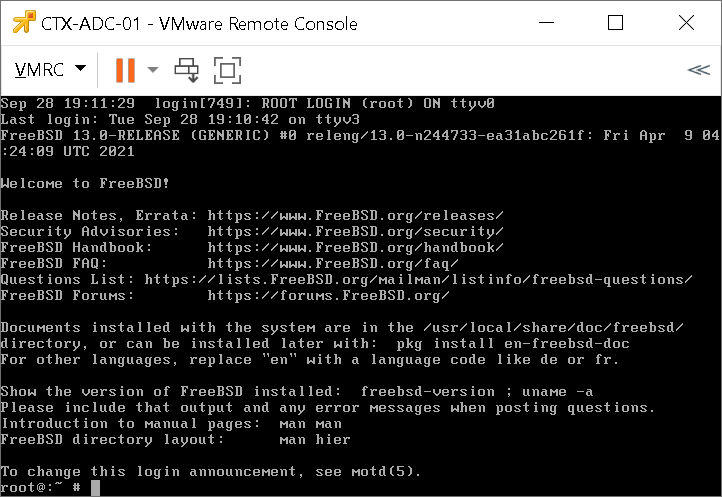
- Authenticate on your VPX.
- Enter in Shell.

- Run command df -h to see the size of the /var folder.
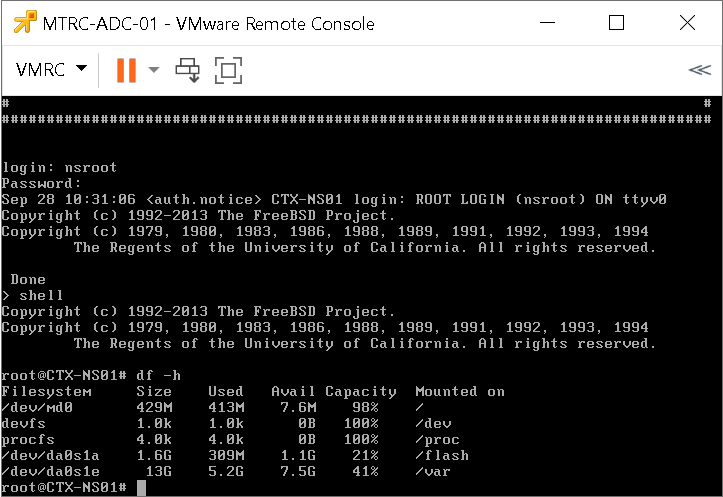
In our case, we have 13Gb with 7.5Gb available.
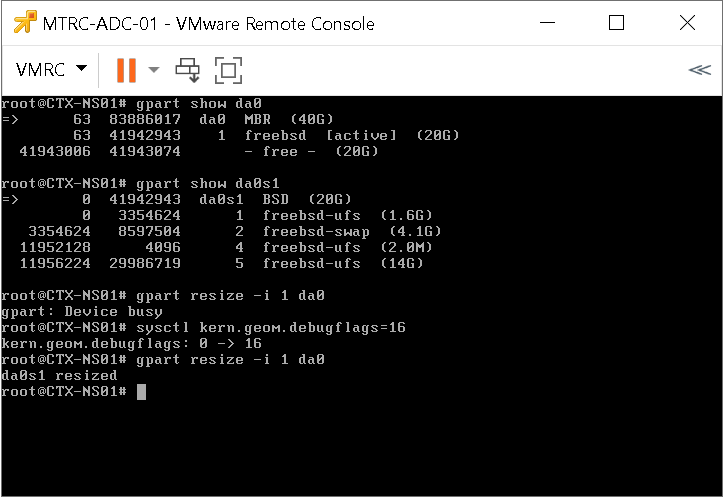
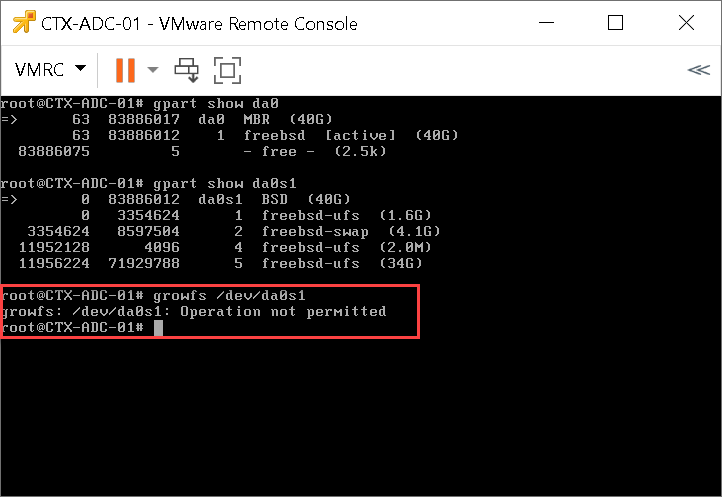
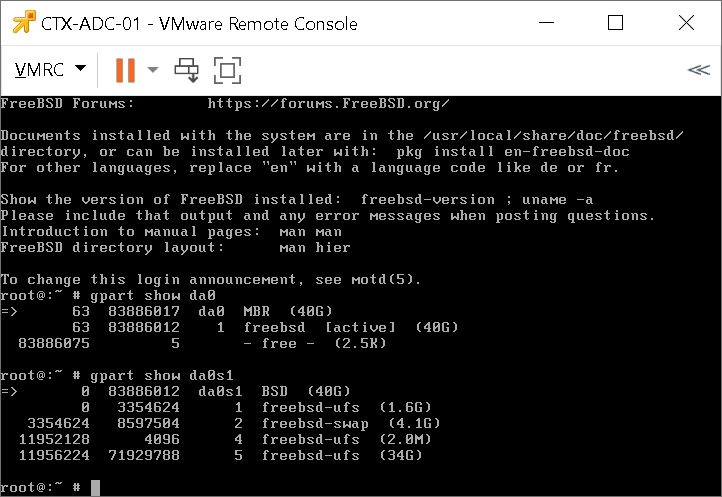
- Run command gpart show da0 to see the total size of the disk.
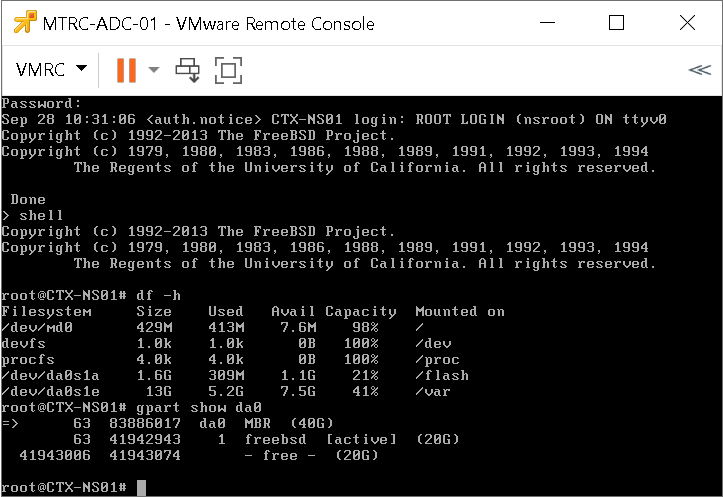
We can see that with have a disk of 40Gb with 20Gb free.
- Run command gpart show da0s1 to see the size of the /var.

Actually we have a size for /var of 14Gb.
- We will first resize da0 by running the command gpart resize -i 1 da0.
If you see Device Busy, then run sysctl kern.geom.debugflags=16 and rerun the previous command.
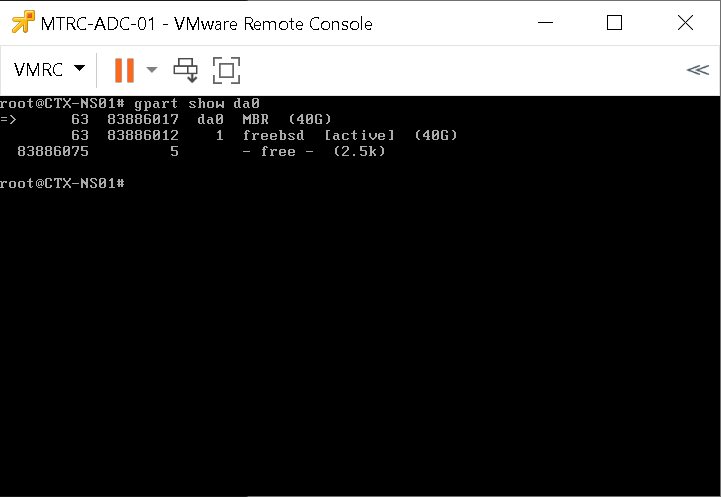
- Now if we run gpart show da0 we can confirm that the disk size is 40Gb.
- Reboot your ADC, connect and go in Shell.
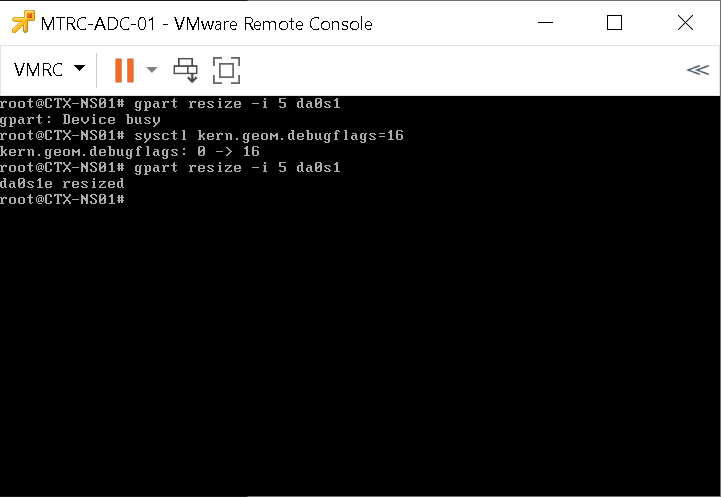
- Then, we will first resize da0s1 by running the command gpart resize -i 5 da0s1.
If you see Device Busy, then run sysctl kern.geom.debugflags=16 and rerun the previous command.
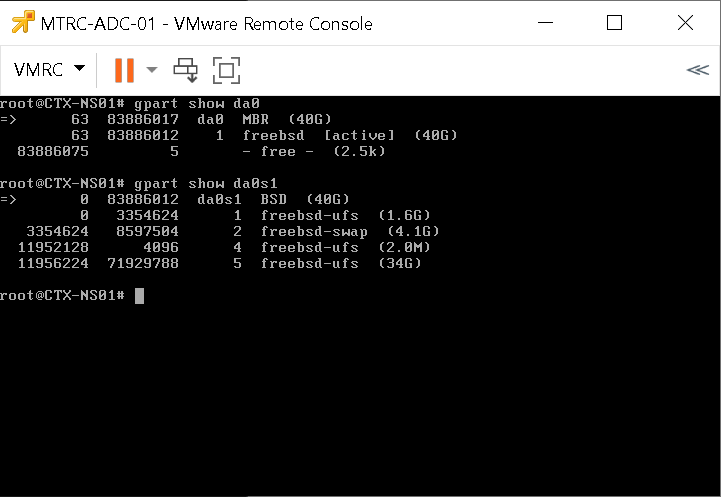
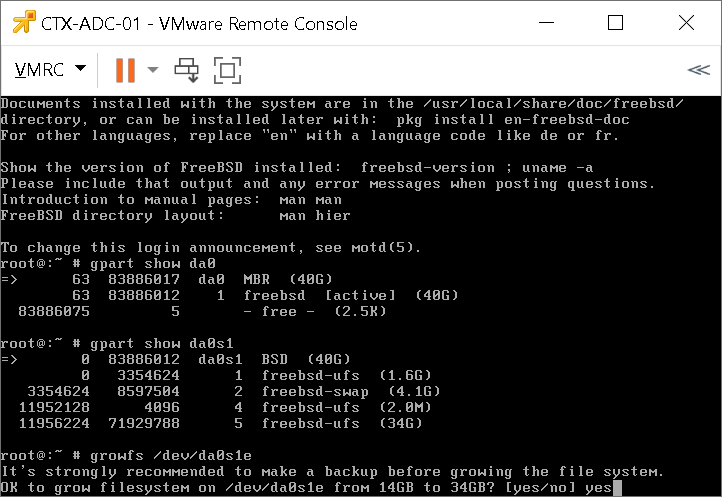
- And if we run gpart show da0s1 we can confirm that we have a size for /var of 34Gb.
- Reboot your ADC, connect and go in Shell.
- Now we will run the growfs /dev/da0s1e command to extend the disk size.
- If you see a message Operation not permitted, this means that this cannot be done online, and we will need to boot with the FreeBSD Live CD.
- Shutdown you ADC.
- Edit VM Settings and click on the VM Options tab.

- Develop Boot Options and for Boot Delay, change it from 0 to 5000. This will give you 5 seconds to enter Boot Menu to select your boot device.

- Click on Virtual Hardware.

- Add a CD/DVD Drive and map the FreeBSD iso, click on OK.
- Start your VM.
- Press Esc during boot to show the Boot Menu.

- Select CD-ROM Drive.
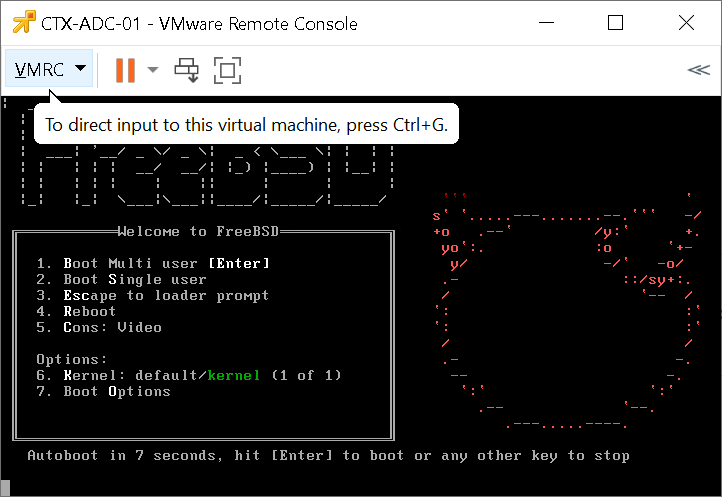
- Let FreeBSD boot.
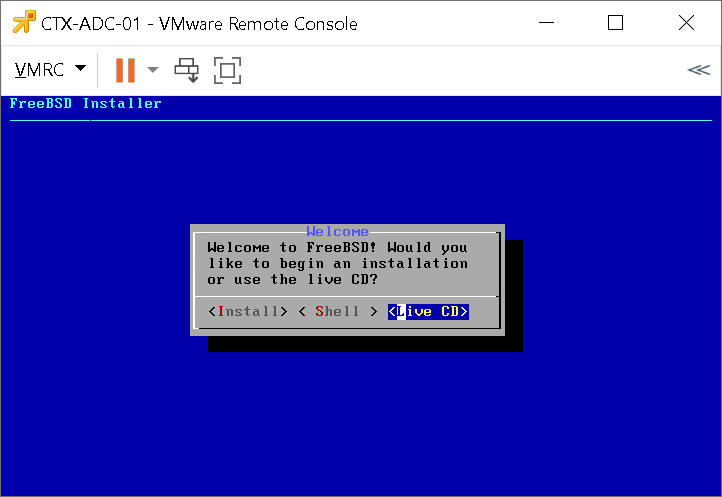
- When prompted, select Live CD.
- Authenticate using Root (no password).
- Run the gpart show da0 command. Here, we can see the total size of 40GB (20GB default size + 20GB increase we did earlier).
- Run the gpart show da0s1 command. Here, we can see the size of 34GB (14GB default size + 20GB increase we did earlier) for /var.
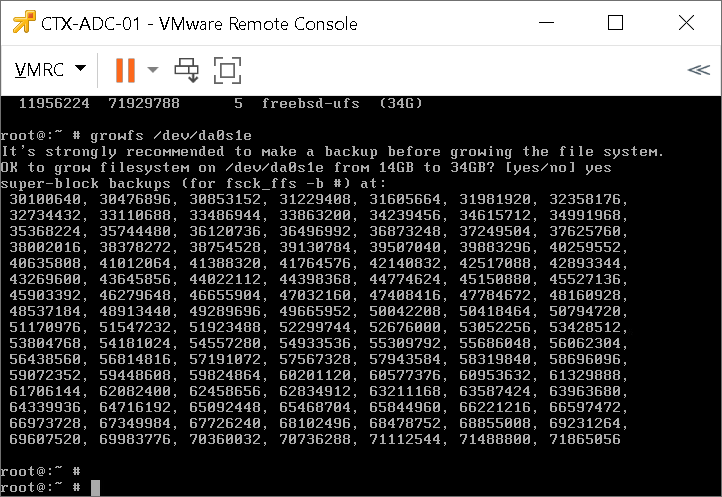
- Run command growfs /dev/da0s1e and confirm with yes.
- Reboot the ADC.

- Connect, go to Shell and run df -h to validate the new size for /var.