
In this article we will see how to install and configure Azure AD Connect.
To keep it simple, I am using a single Domain Controller with 2 users accounts created.
I will also install Azure AD Connect on my Domain Controller (event if it’s not recommended, as it is a Lab, I do not have any security concern.
Azure AD Connect has two installation types for new installation: Express and customized.
Express
Express is the most common option and is used by about 90% of all new installations. It was designed to provide a configuration that works for the most common customer scenarios.
It assumes:
- You have a single Active Directory forest on-premises.
- You have an enterprise administrator account you can use for the installation.
- You have less than 100,000 objects in your on-premises Active Directory.
You get:
- Password hash synchronization from on-premises to Azure AD for single sign-on.
- A configuration that synchronizes users, groups, contacts, and Windows 10 computers.
- Synchronization of all eligible objects in all domains and all OUs.
- Automatic upgrade is enabled to make sure you always use the latest available version.
Options where you can still use Express:
- If you do not want to synchronize all OUs, you can still use Express and on the last page, unselect Start the synchronization process…*. Then run the installation wizard again and change the OUs in configuration options and enable scheduled sync.
- You want to enable one of the features in Azure AD Premium, such as Password writeback. First go through express to get the initial installation completed. Then run the installation wizard again and change the configuration options.
Custom
The customized path allows many more options than express. It should be used in all cases where the configuration described in previous section for express is not representative for your organization.
Use when:
- You do not have access to an enterprise admin account in Active Directory.
- You have more than one forest or you plan to synchronize more than one forest in the future.
- You have domains in your forest not reachable from the Connect server.
- You plan to use federation or pass-through authentication for user sign-in.
- You have more than 100,000 objects and need to use a full SQL Server.
- You plan to use group-based filtering and not only domain or OU-based filtering.
Express installation of Azure AD Connect
Before you start installing Azure AD Connect, make sure to download Azure AD Connect
You can see these steps in action in the videos section.
- Sign in as a local administrator to the server you wish to install Azure AD Connect on. You should do this on the server you wish to be the sync server.

- Navigate to and double-click AzureADConnect.msi.
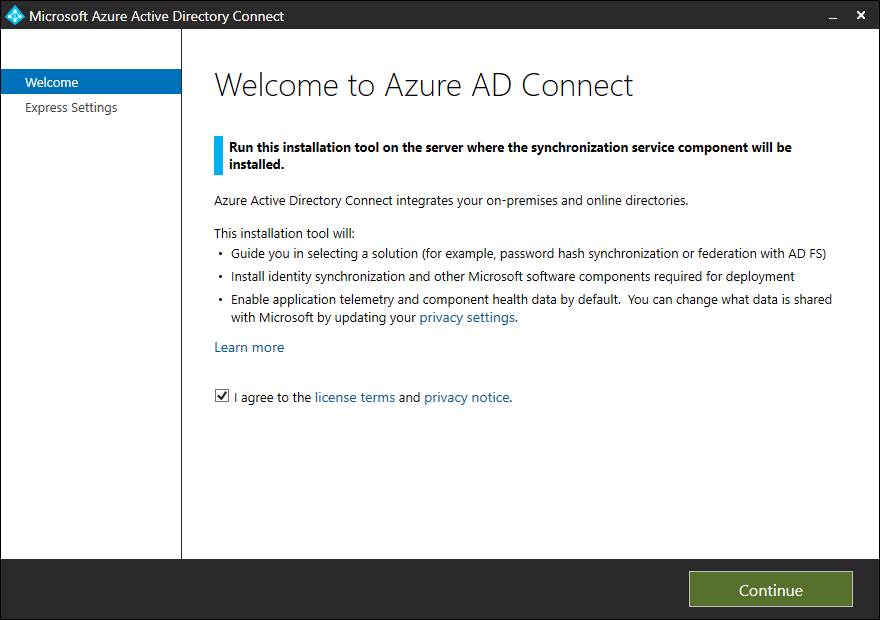
- On the Welcome screen, select the box agreeing to the licensing terms and click Continue.

- On the Express settings screen, click Use express settings.
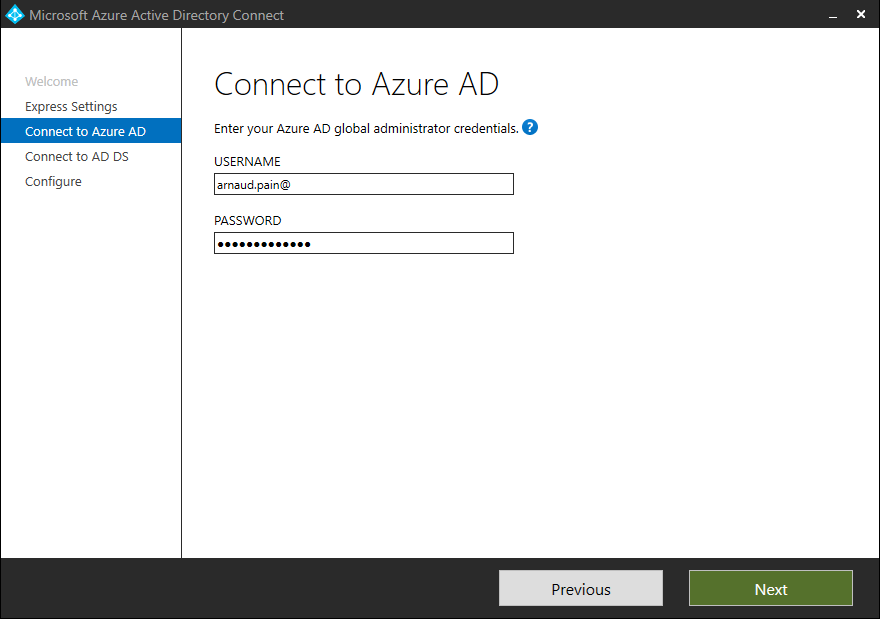
- On the Connect to Azure AD screen, enter the username and password of a global administrator for your Azure AD. Click Next
If you receive an error and have problems with connectivity, then see Troubleshoot connectivity problems.
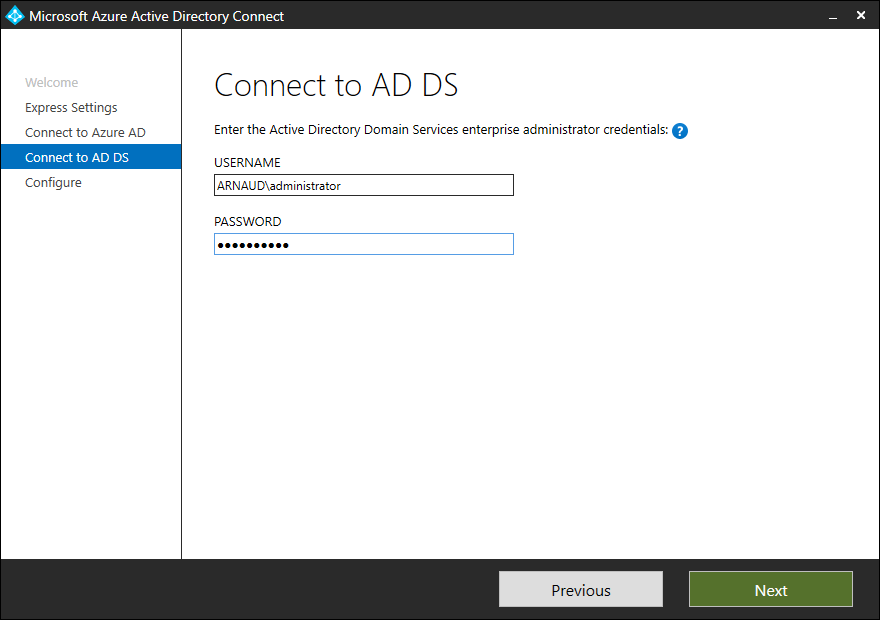
- On the Connect to AD DS screen, enter the username and password for an enterprise admin account. You can enter the domain part in either NetBios or FQDN format, that is, FABRIKAM\administrator or fabrikam.com\administrator. Click Next.
- The Azure AD sign-in configuration page only shows if you did not complete verify your domains in the prerequisites.
If you see this page, then review every domain marked Not Added and Not Verified. Make sure those domains you use have been verified in Azure AD. Click the Refresh symbol when you have verified your domains.
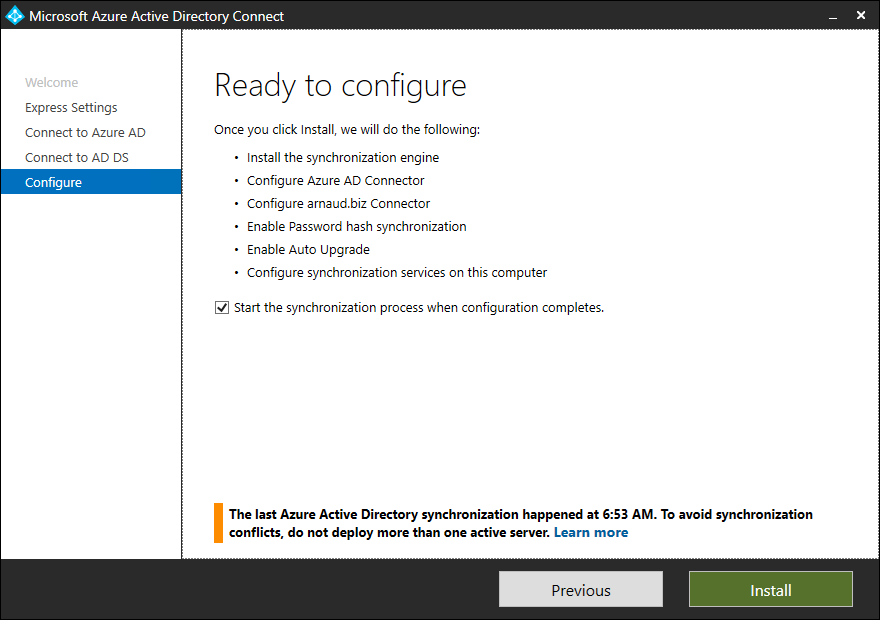
- On the Ready to configure screen, click Install.
- Optionally on the Ready to configure page, you can unselect the Start the synchronization process as soon as configuration completes checkbox. You should unselect this checkbox if you want to do additional configuration, such as filtering. If you unselect this option, the wizard configures sync but leaves the scheduler disabled. It does not run until you enable it manually by rerunning the installation wizard.
- Leaving the Start the synchronization process as soon as configuration completes checkbox enabled will immediately trigger a full synchronization to Azure AD of all users, groups, and contacts.
- If you have Exchange in your on-premises Active Directory, then you also have an option to enable Exchange Hybrid deployment. Enable this option if you plan to have Exchange mailboxes both in the cloud and on-premises at the same time.

- When the installation completes, click Exit.
- After the installation has completed, sign off and sign in again before you use Synchronization Service Manager or Synchronization Rule Editor.
Videos
For a video on using the express installation, see:
Validation
- Log to your Microsoft Admin Portal

- Click on Users > Active Users

- As you can see above, my 2 AD users have been created.
Next Step
In the next post we will see all the options allowed wit Azure AD Connect
Stay tunned …