After my previous article on how to install and configure SQL Basic Availability Group now it’s time for WEM Database creation.
Here after are the steps I did to make it working
Prerequisites
Create an empty WEM Database
First you will need to create an empty WEM Database on the Primary SQL Server
- Open SQL Management Studio

- Connect to primary SQL Server, make a right click on Databases and select New Database…

- Provide a name for the DB and click on OK
Create Database on WEM Server
As after we will create a BAG, we first need to create an alias for BAG Name to point to primary SQL Server.
In my case I have done the following

- Create a Host entry for the Listener
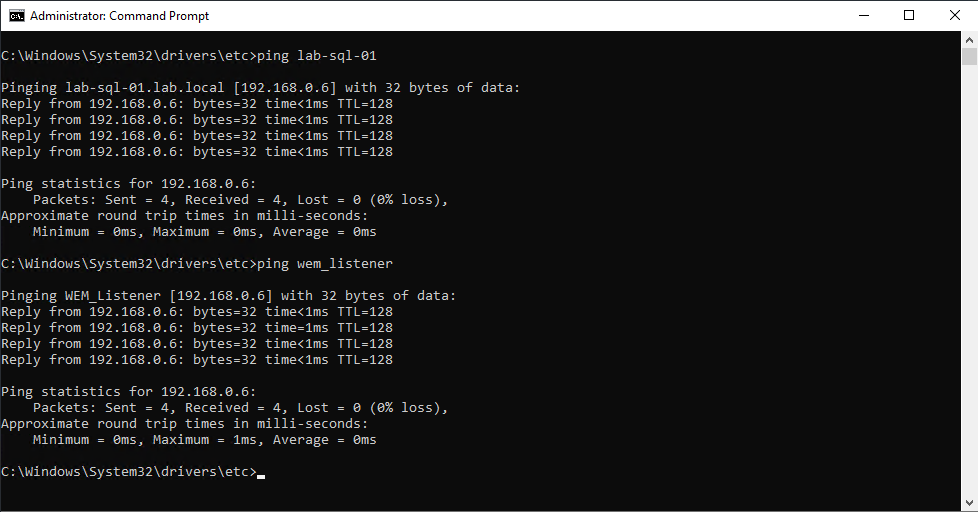
- Ensure Listener and primary SQL server reply on same IP

- Open WEM Database Management Utility
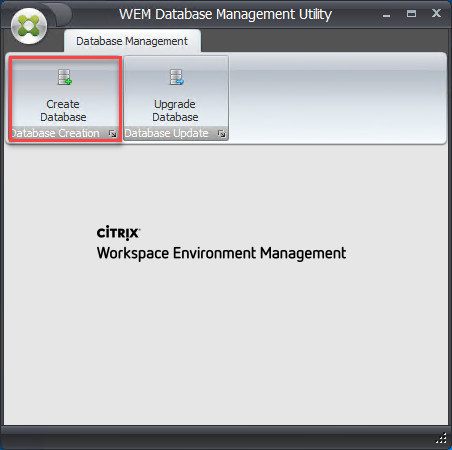
- Click on Create Database
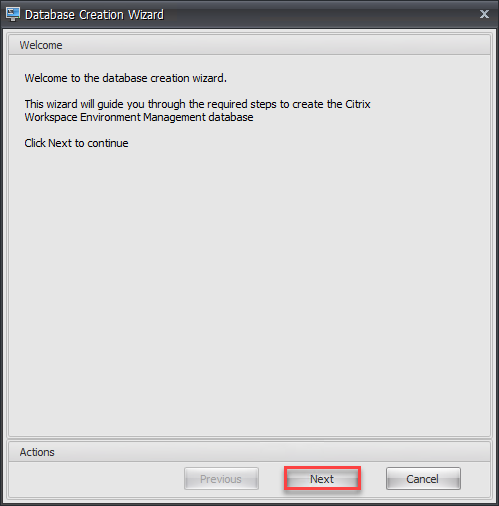
- Click on Next
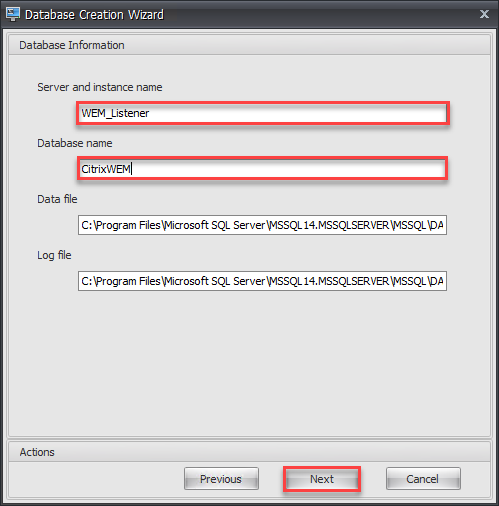
- Provide name of the Listener (created previously in the Hosts file on the server), the Database (created earlier) and click on Next
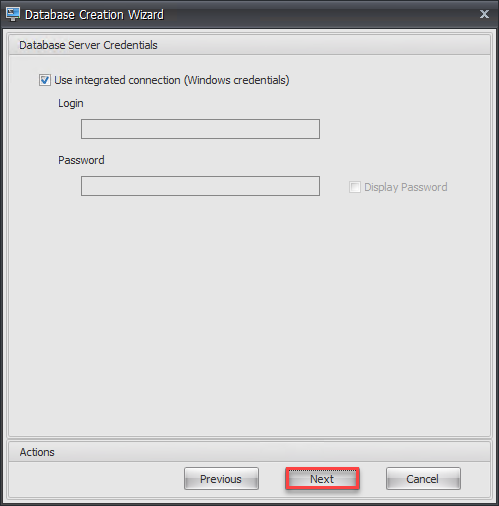
- If the user is Sysadmin on SQL, just click on Next
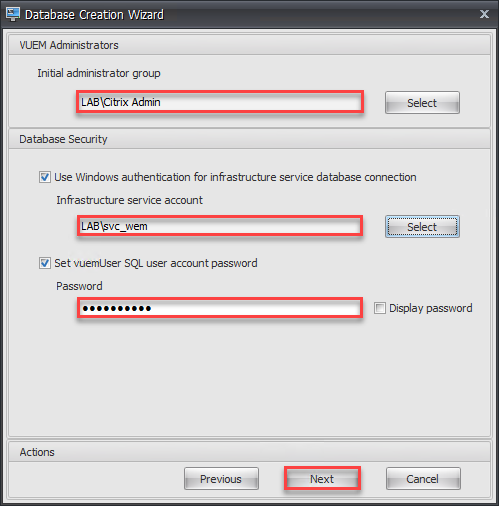
- Select an Administrator group, optionally provide a service account, provide a password for vuemUser SQL account and click on Next
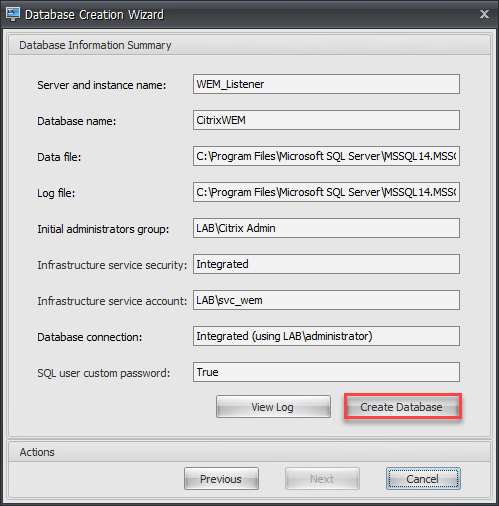
- Click on Create Database
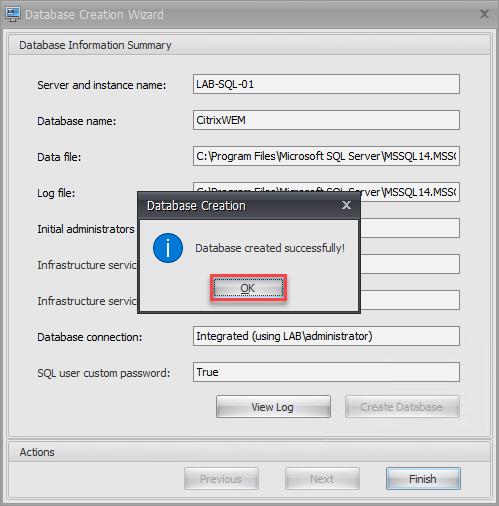
- Click on OK
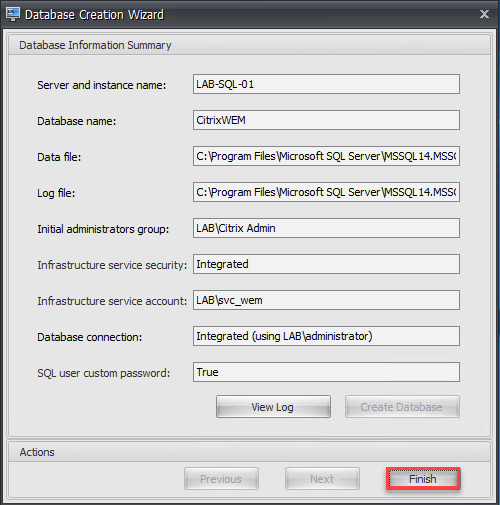
- Click on Finish
Create BAG on SQL Server
After the DB has been created using WEM utility, we can create the BAG

- Select the CitrixWEM database, make a right click and select Tasks > Back Up…
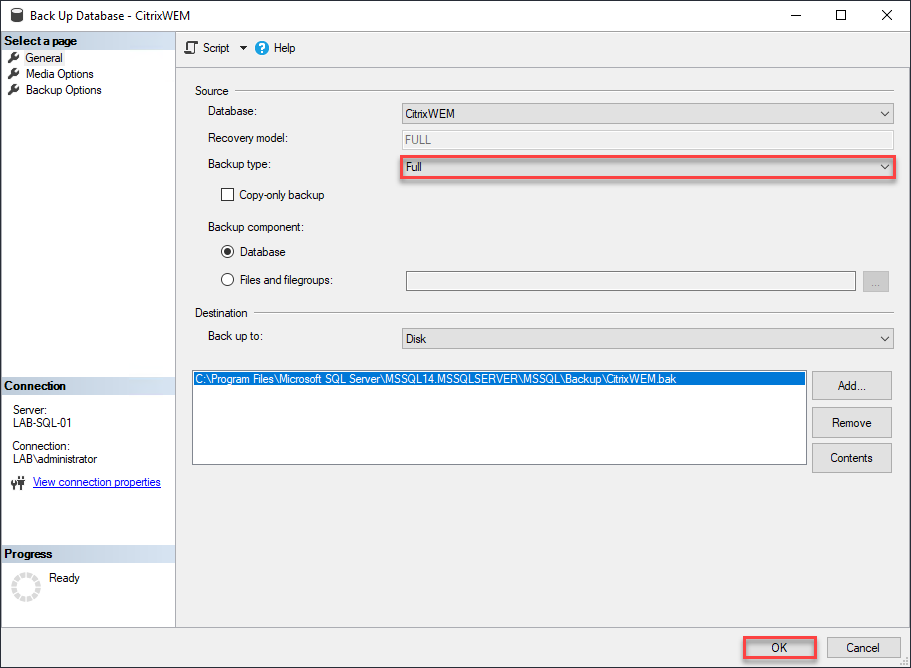
- Ensure that Backup type is Full and click on OK
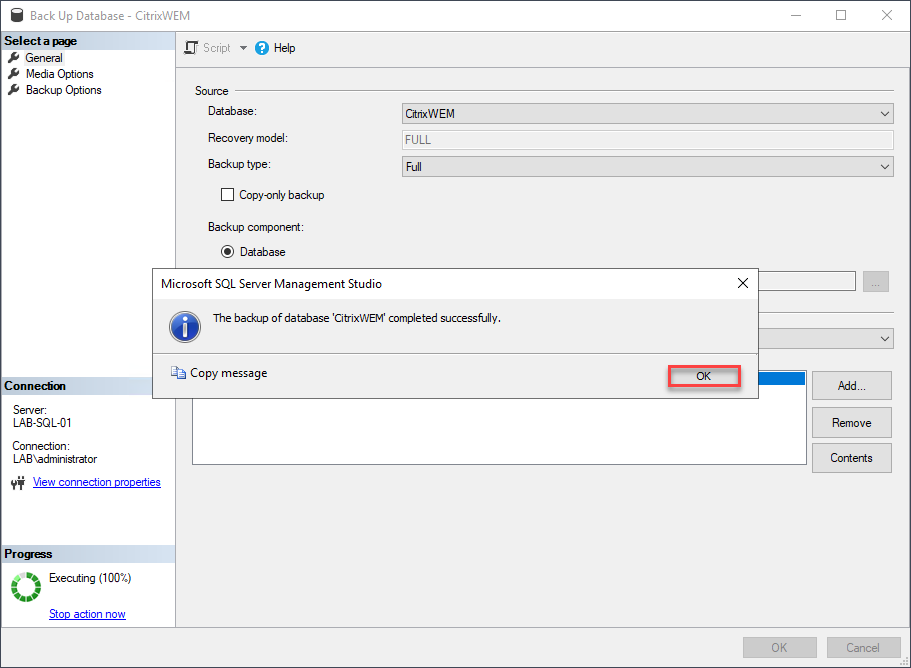
- Click on OK

- on Always On High Availability > Availability Groups, make a right click and select New Availability Group Wizard
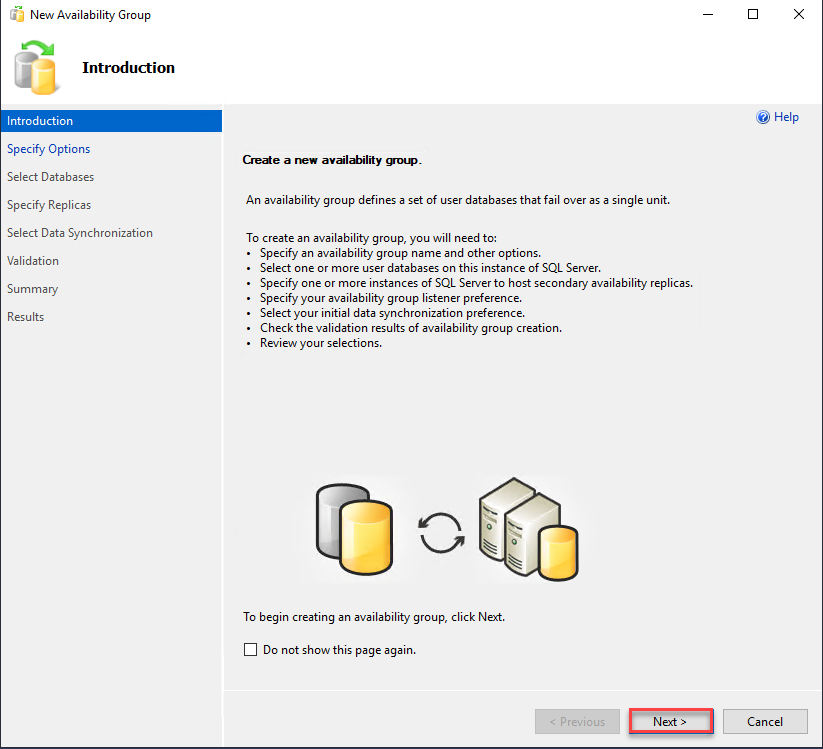
- Click on Next
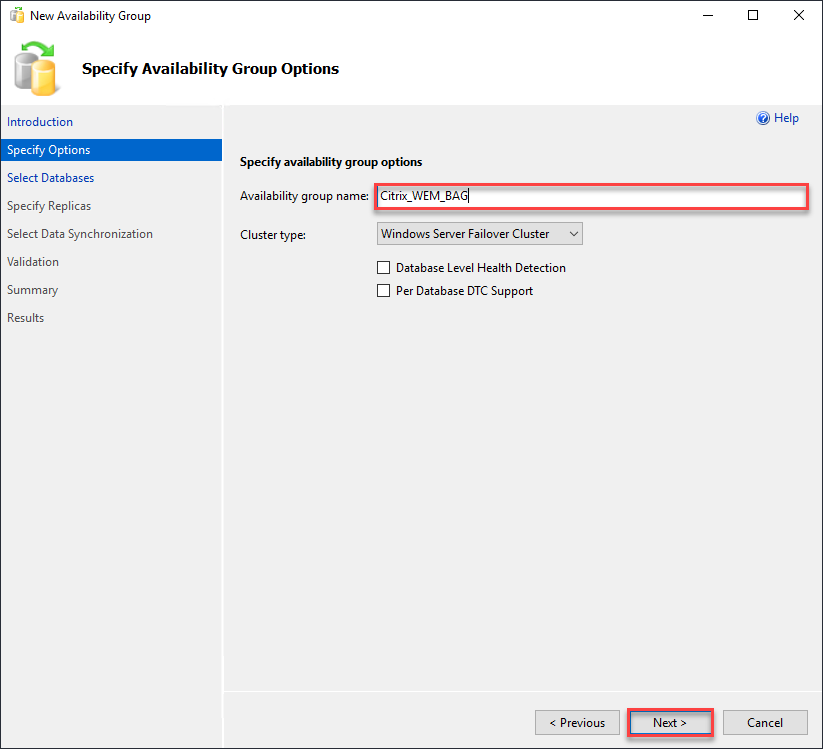
- Provide a name for Availability group and click on Next
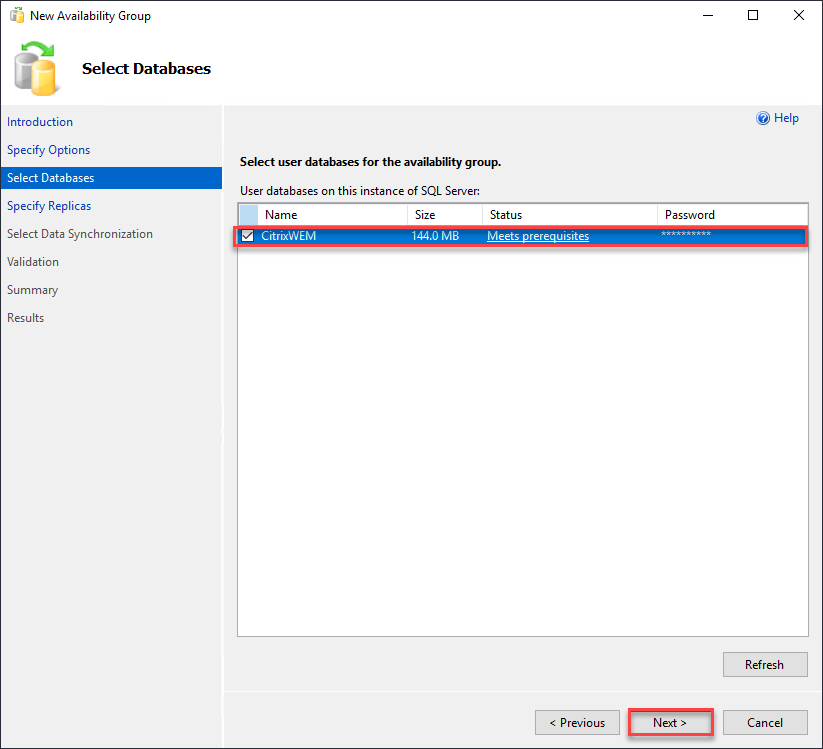
- Provide the vuemUser SQL user account password (set during WEM Database creation), click on Refresh and select the Database. Click on Next
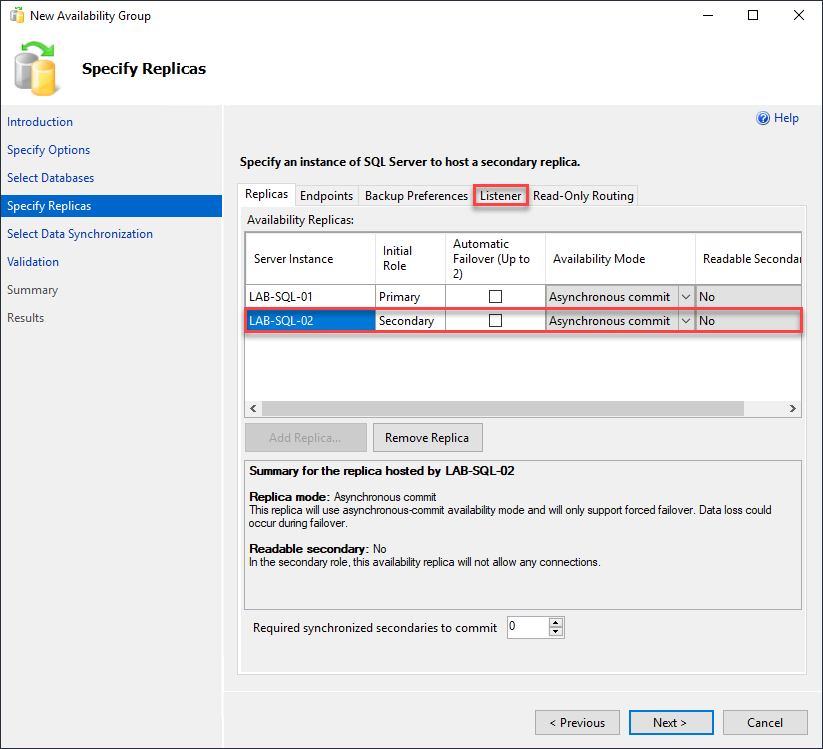
- Provide a Replica and click on Listener tab

- Select Create an availability group listener radio button, provide Listener DNS Name, Port, add an IP for Listener and click on Next
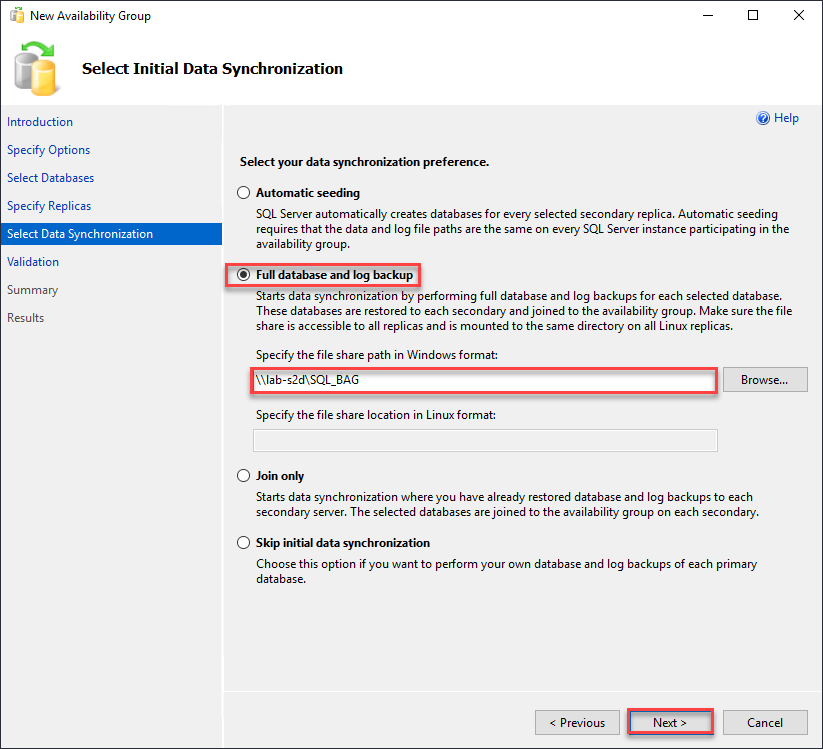
- Select Full database and log backup radio button, provide a path and click on Next
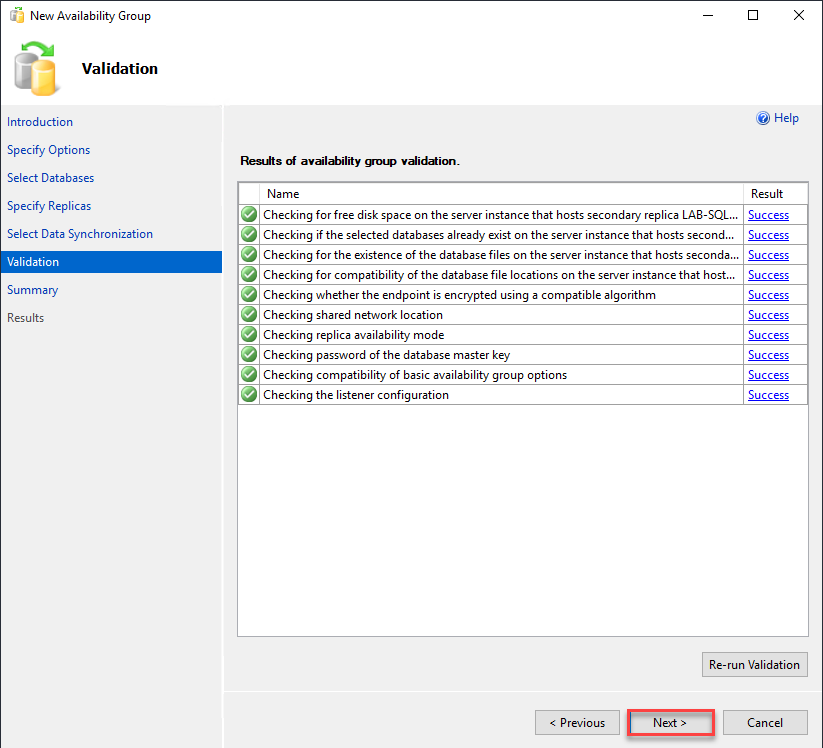
- After validation, click on Next
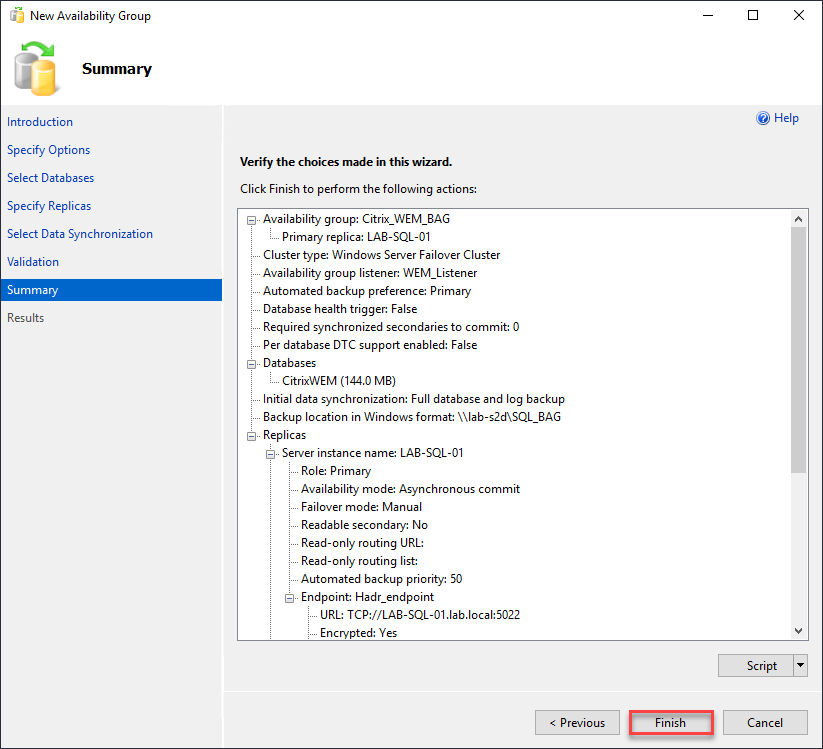
- Click on Finish
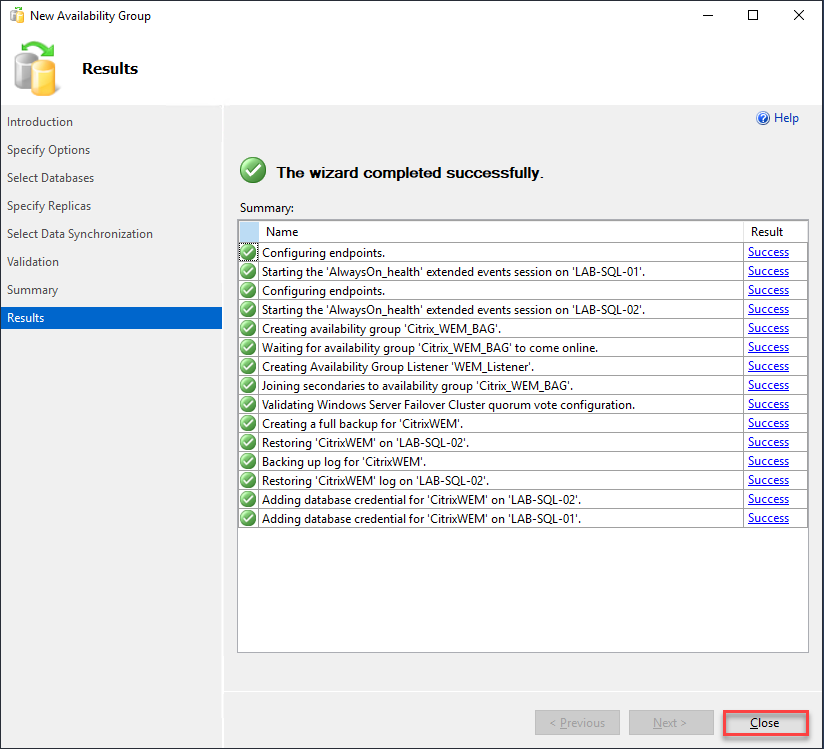
- Click on Close
- Ensure Availability Group is created
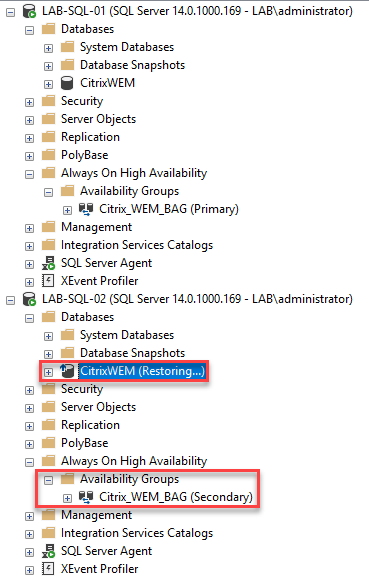
Note: as you can see above, on my secondary Node, the database is in Restoring state.

- You need to go on secondary SQL server, develop Always On High Availability > Availability Groups > BAG_Name > Availability Databases, select Database, make a right click and select Join to Availability Group
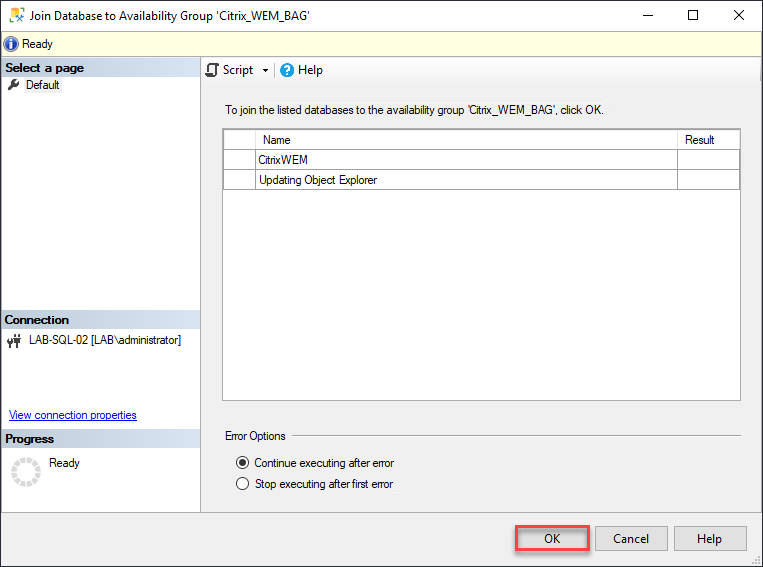
- Click on OK
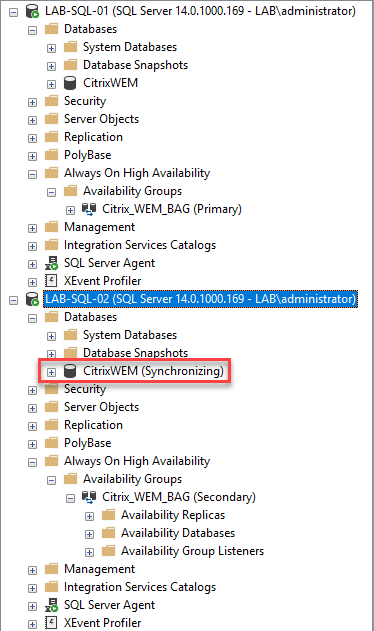
- Refresh the console, now the Database state is Synchronizing

- Select the BAG, make a right click and select Properties
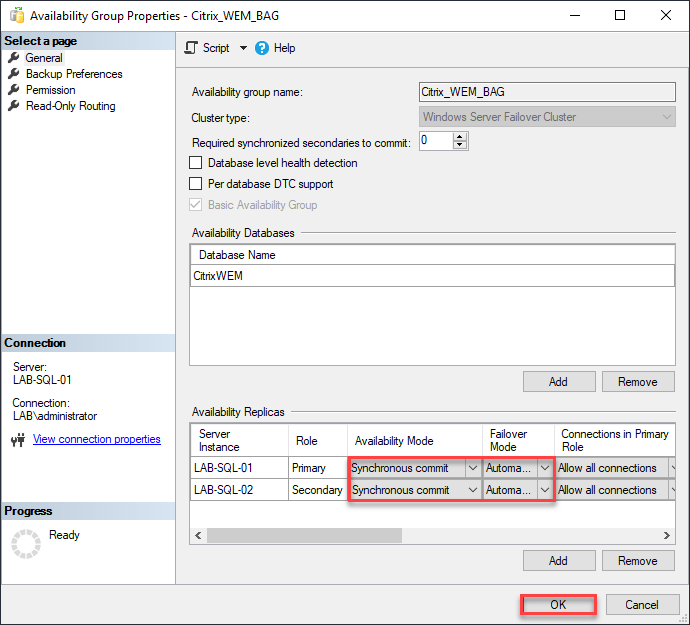
- Change Availability Mode from Asynchonous commit to Synchronous commit and Failover Mode from Manuel to Automatic and click on OK
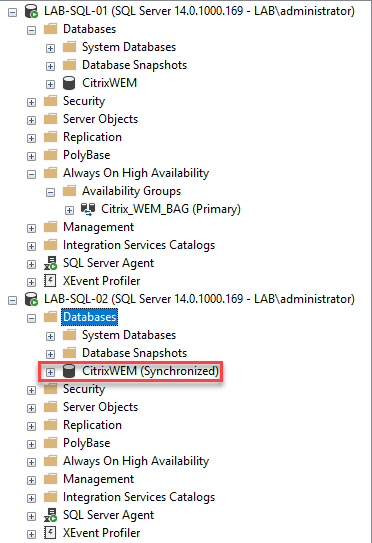
- The Database state on secondary Node will change to Synchronized
We need to synchronize the WEM service account between SQL Nodes, to do so:
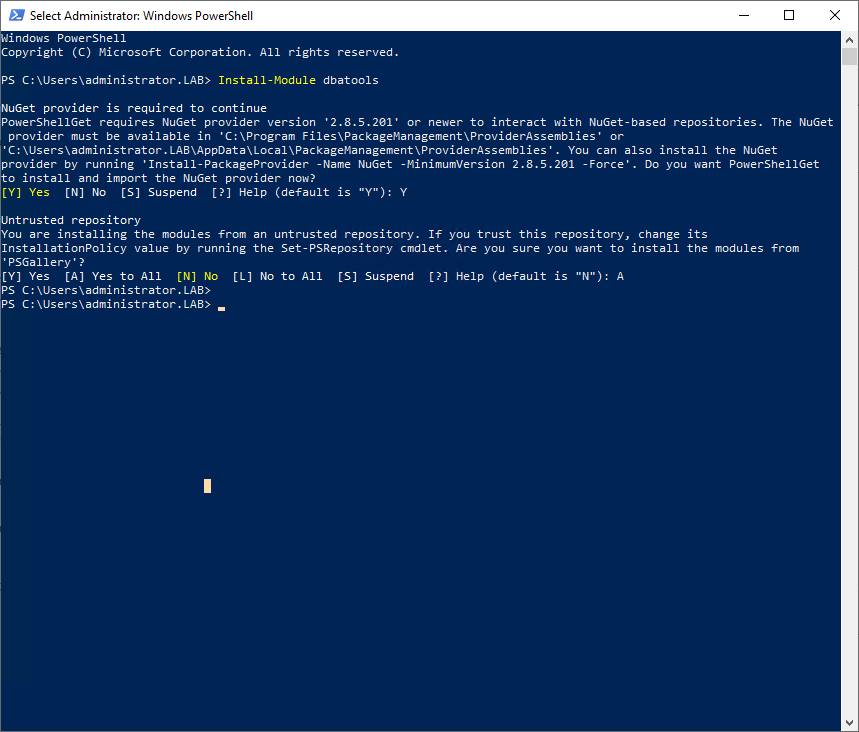
- On the primary SQL Server, open an elevated PowerShell command and run Install-Module dbatools
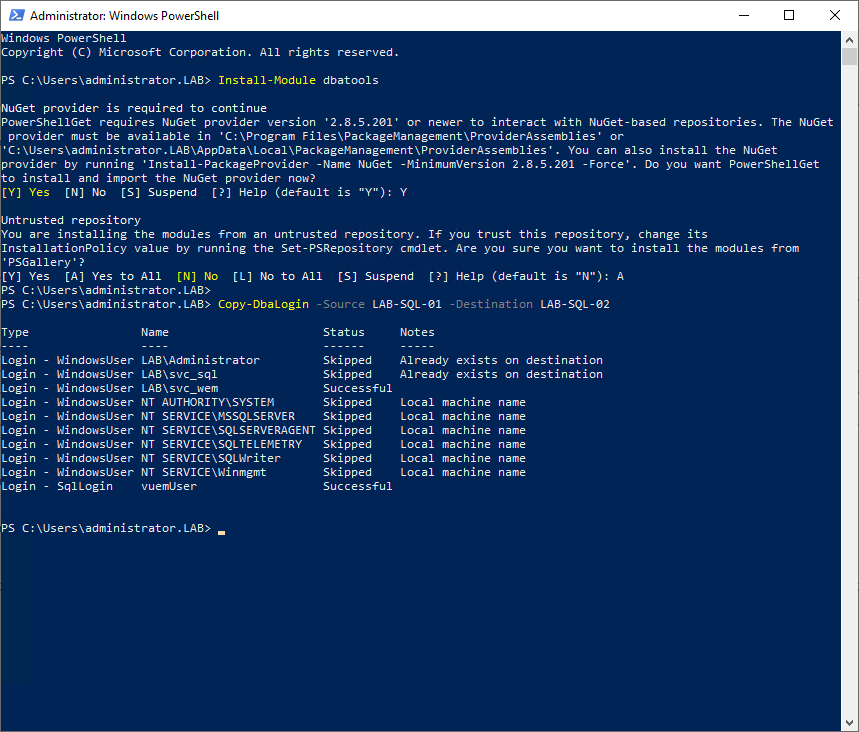
- Run the command: Copy-DbaLogin -Source LAB-SQL-01 -Destination LAB-SQL-02
WEM Infrastructure Service Configuration

- Open WEM Infrastructure Service Configuration Utility
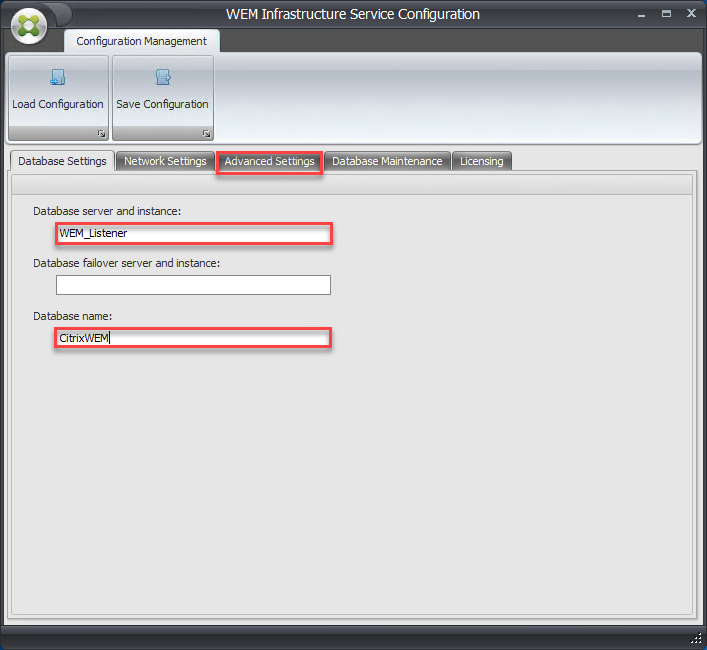
- Provide Listener for Database server, the database name and click on Advanced Settings tab
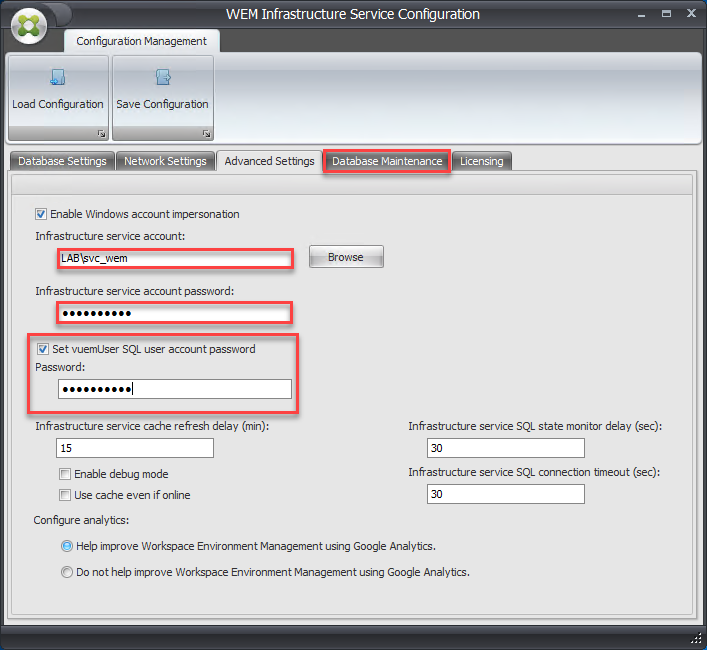
- Provide a infrastructure service account (need to be member of the local administrator group on the WEM server), provide the password for vuemUser SQL user account and click on Database Maintenance tab

- Enable maintenance and click on Licensing tab
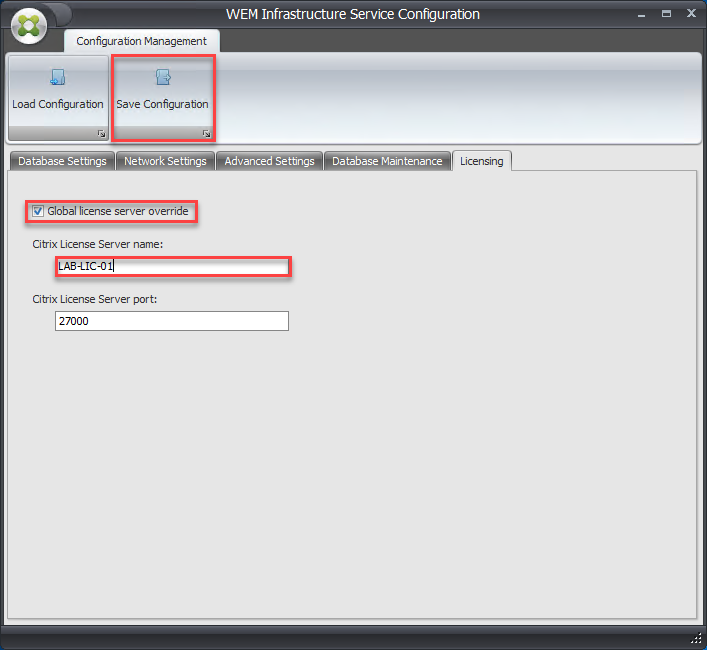
- Provide license server and click on Save Configuration
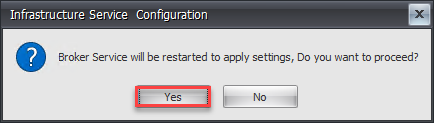
- Click on Yes and exit WEM Infrastructure Service Configuration
Validation
To validate, we will initiate a Failover

- Within Failover Cluster Manager console, ensure Role is owned by 1st Node

- Within SQL Server Management Studio, make a right click on the primary Availability Group and select Failover
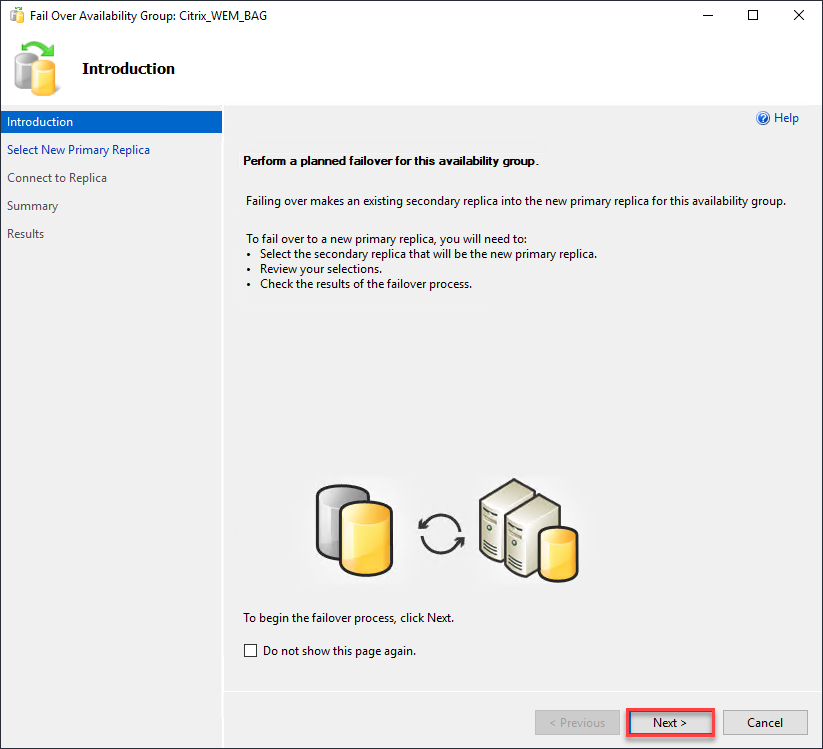
- Click on Next
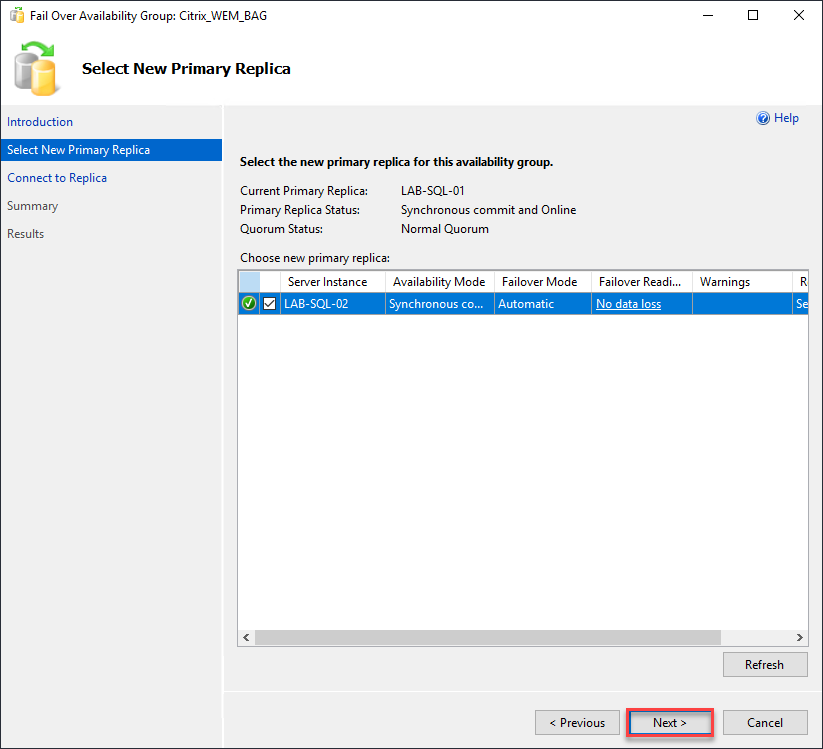
- Ensure 2nd Node is selected and click on Next
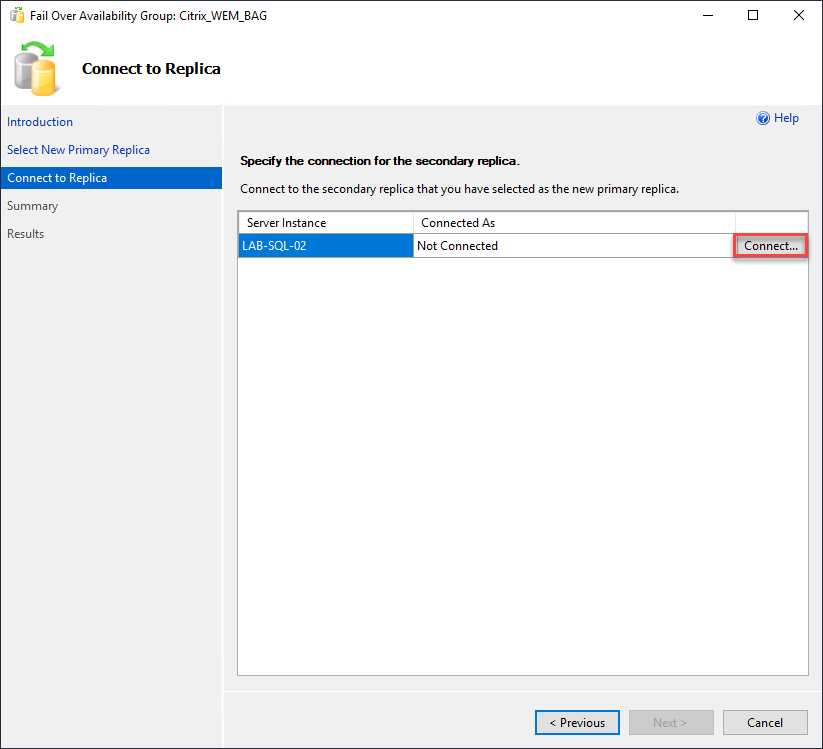
- Click on Connect
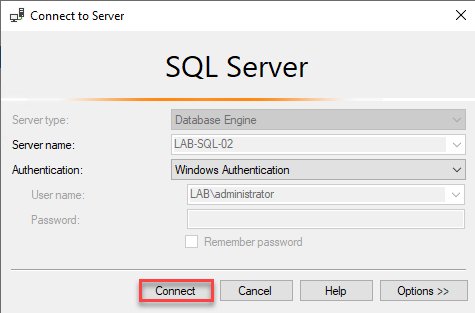
- Click on Connect
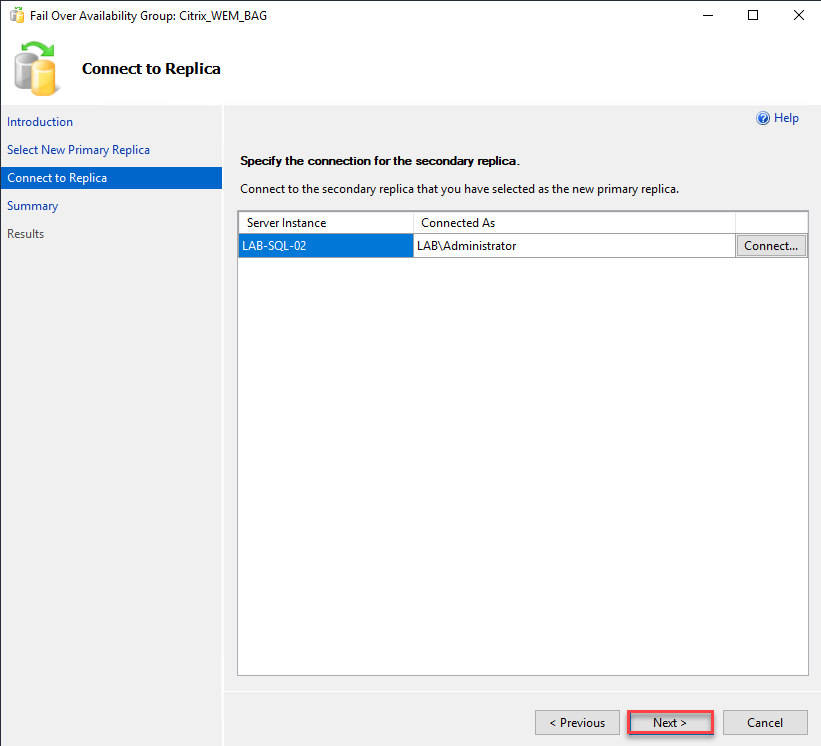
- Click on Next
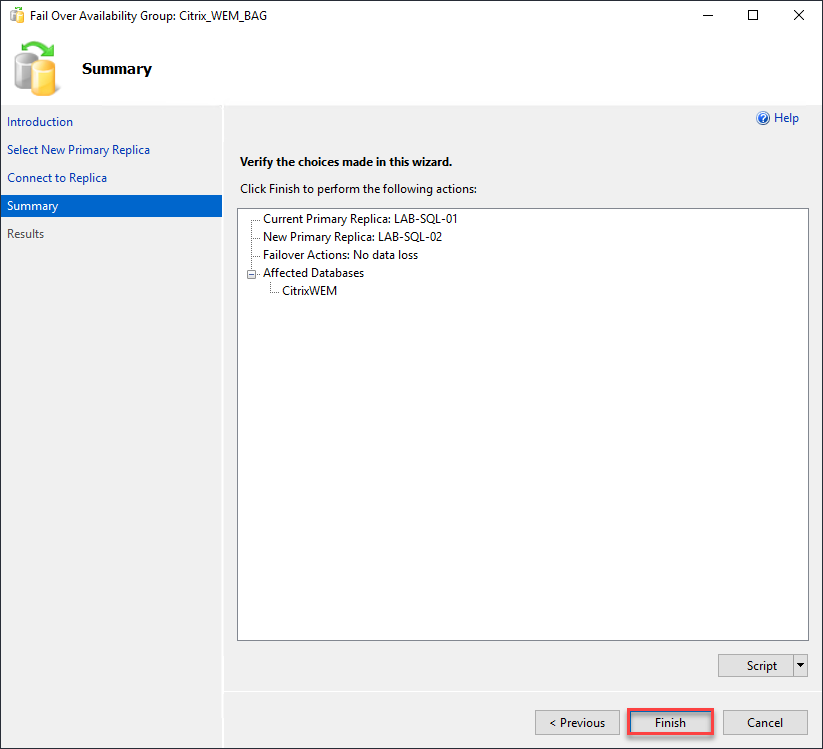
- Click on Finish
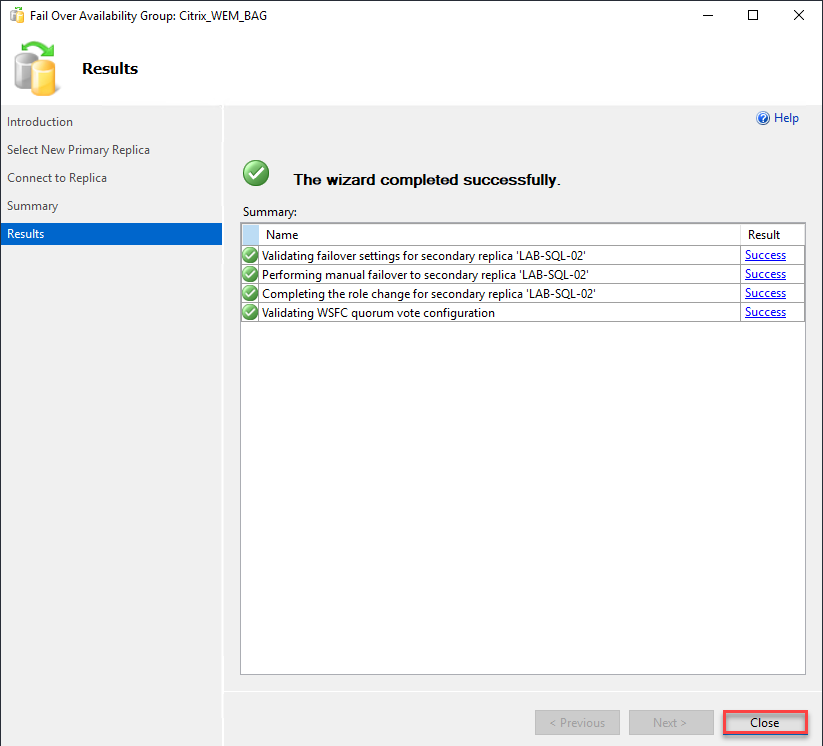
- Click on Close
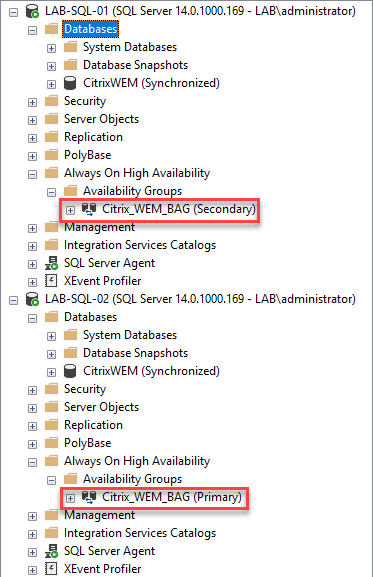
- Verify that BAG is primary on 2nd Node and Secondary on 1st Node

- Ensure as well in Failover Cluster Manager that Role is owned by 2nd Node

- Open WEM Administration Console

- Click on Connect
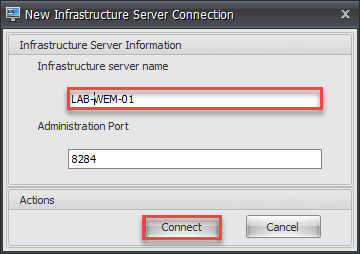
- Provide the Infrastructure server name and click on Connect

- You should connect and see the console
You can do the same for other Citrix products Database like:
- Citrix Virtual Apps and Desktop
- Citrix Endpoint Management
